Atlantik iCon Installation Guide and Apps Manual
Getting Started
What’s in the box
- Orphek Atlantik iCon/Orphek Atlantik iCon Compact array
- Stainless steel hanging kit
- Antennae
- Power cords with waterproof connectors and Plug
- Mean well power supply with waterproof connectors
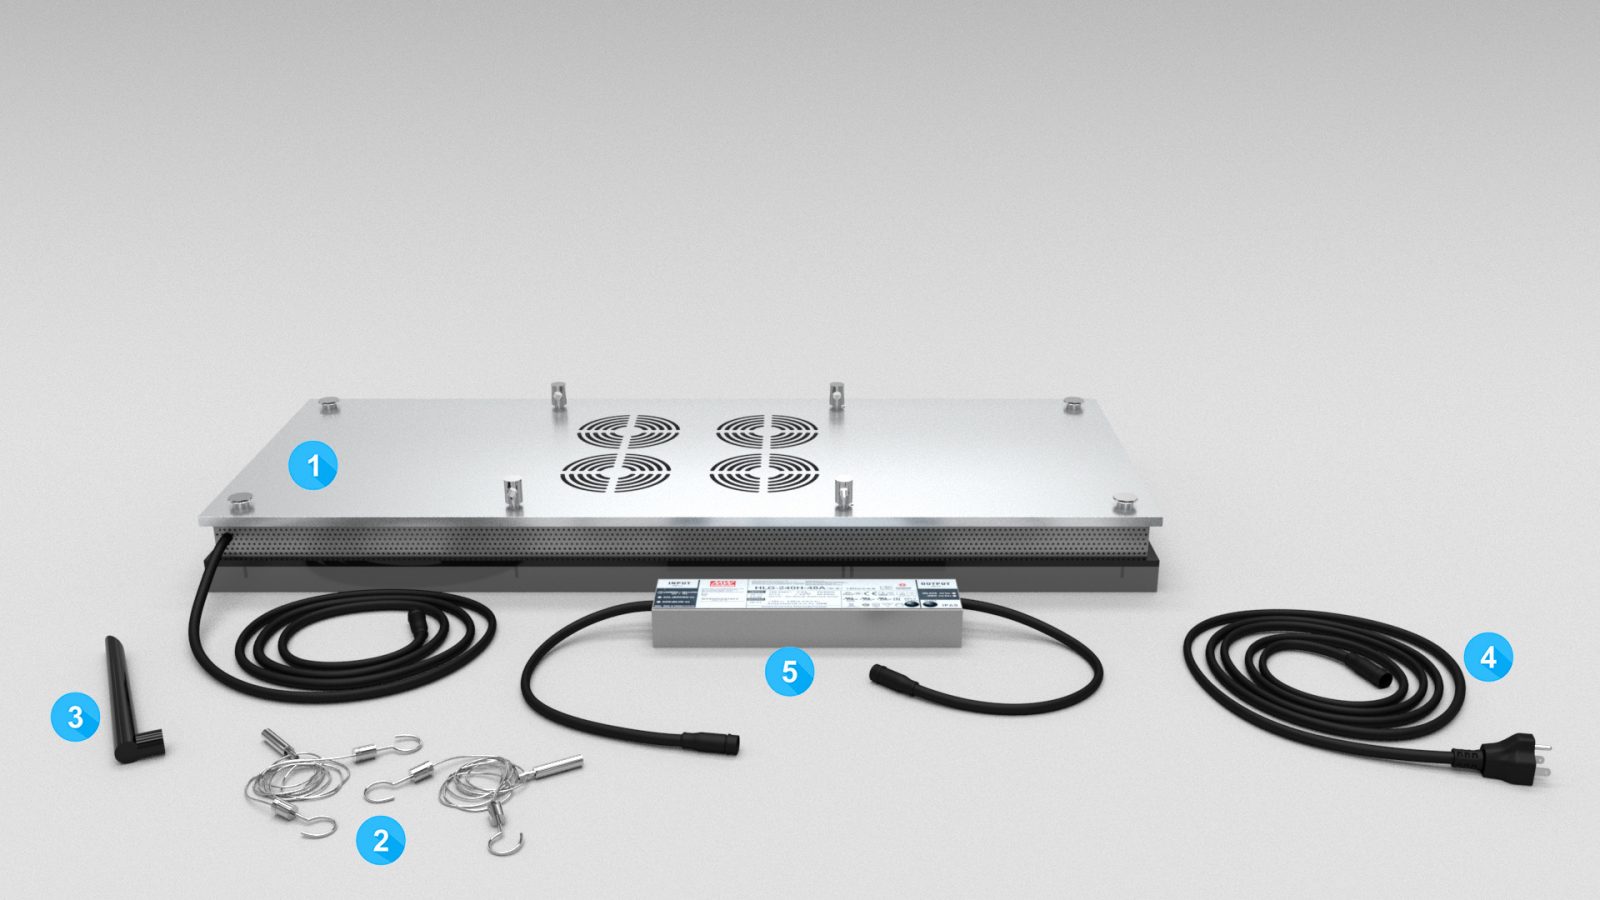
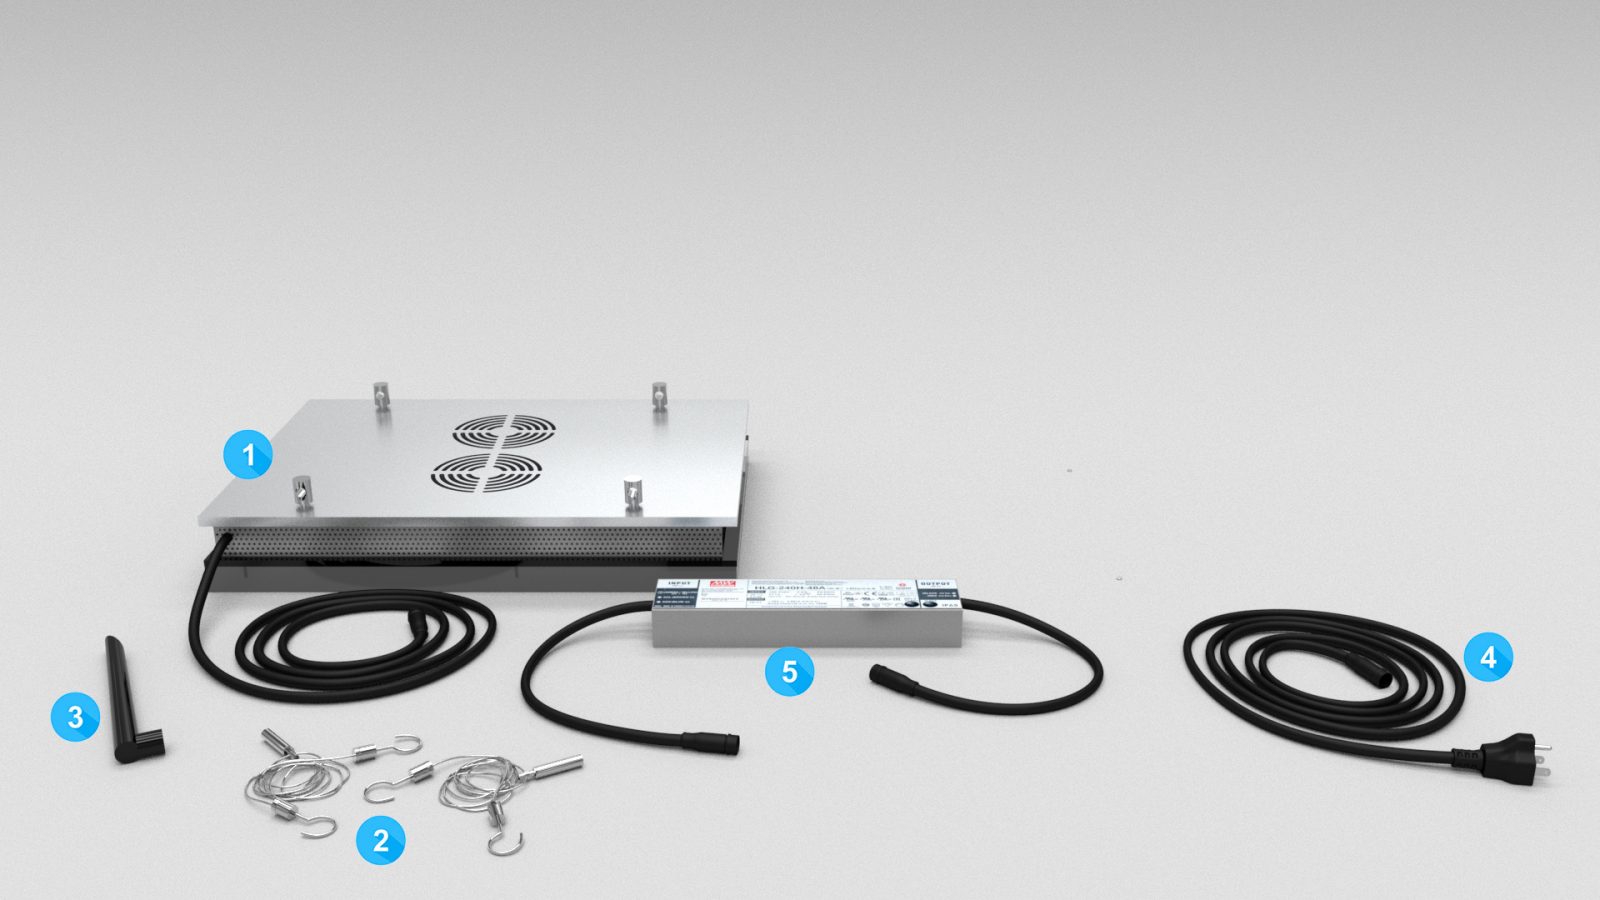
Start by turning on the light for the first time
After carefully reading the safety guide and following its procedures you are all set to switch on your unit(s) for the first time.
So let’s see how to do it:
Connect all Orphek Atlantik iCon components together:
- Connect the Atlantik iCon to Mean well power supply : connect the Waterproof Electric Cord Connector of the light to the OUTPUT side of the Mean well power supply.
- Connect the Mean well power supply to the electric Plug cord: connect it to the INPUT side of the Electric Cord with plug (the one that connects to an electric socket).
- Connect the Antenna to the light: connect the antenna to the antenna socket .
- Connect the light electric plug to the home electric socket. The Light will turn on and will stay at 80% of the intensity.
Now that you turned your light ON let’s download Orphek App.!
Accessing your Orphek Atlantik iCon App:


Important: With your light(s) turned ON choose one of these options and download Orphek iCon app.
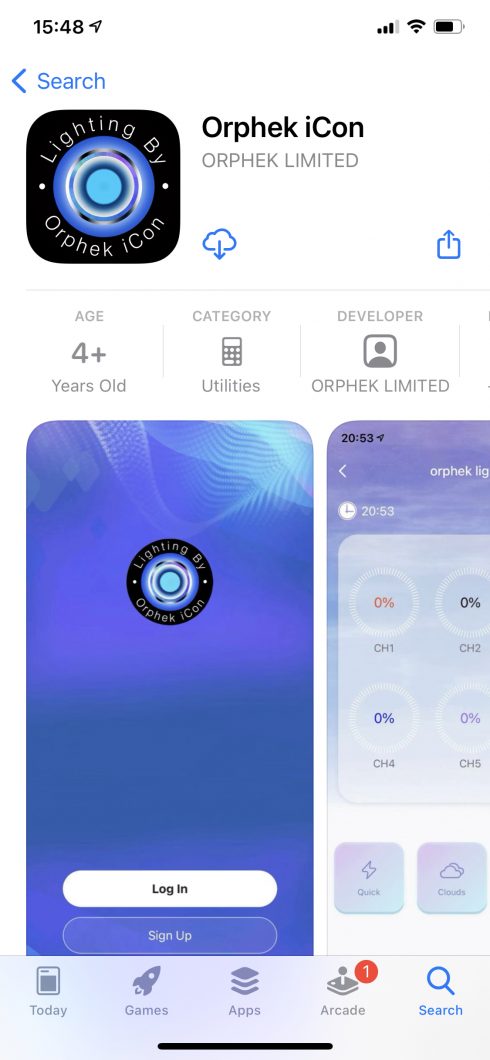
Now that you have concluded downloading the Orphek App., let’s learn how to use it.
Using the Orphek iCon App.
First you need to do the Signing UP and Registering – here’s how to do it:
- Orphek iCon App. will ask to Sign Up or Log In. Since it is your first time, choose Sign Up.
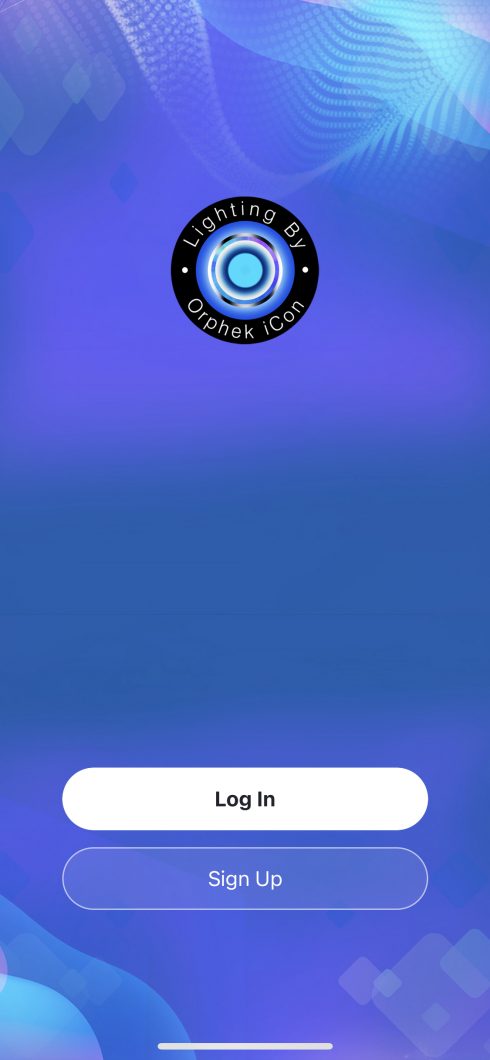
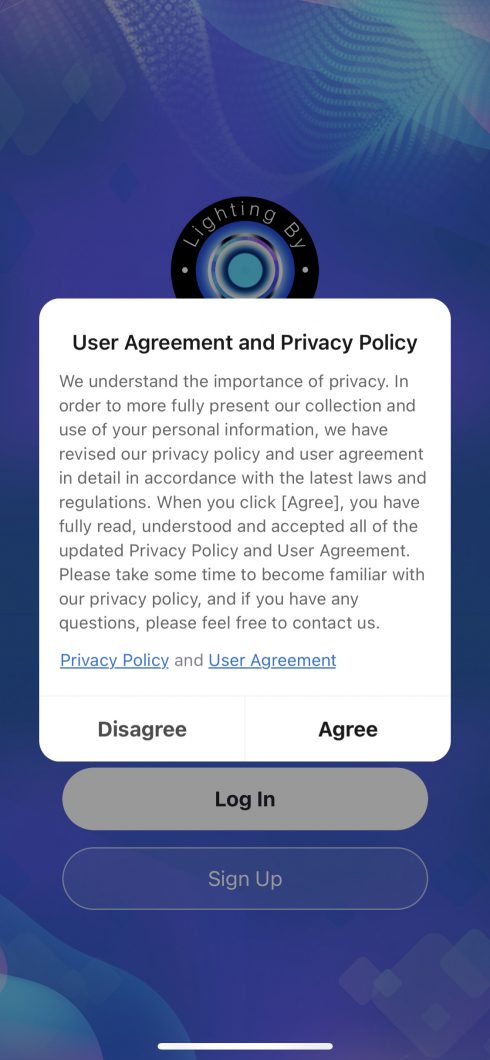
2. Click to agree with User Agreement and Privacy Policy.
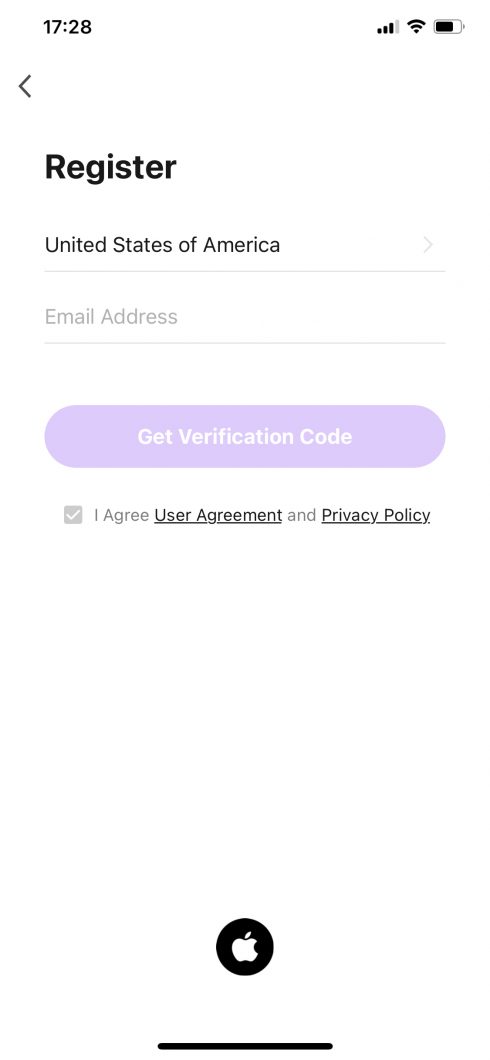
3. Complete your registration by choosing an email address (please notice that you need to have one already because you will receive a verification code in this email address) and click on GET VERIFICATION CODE.
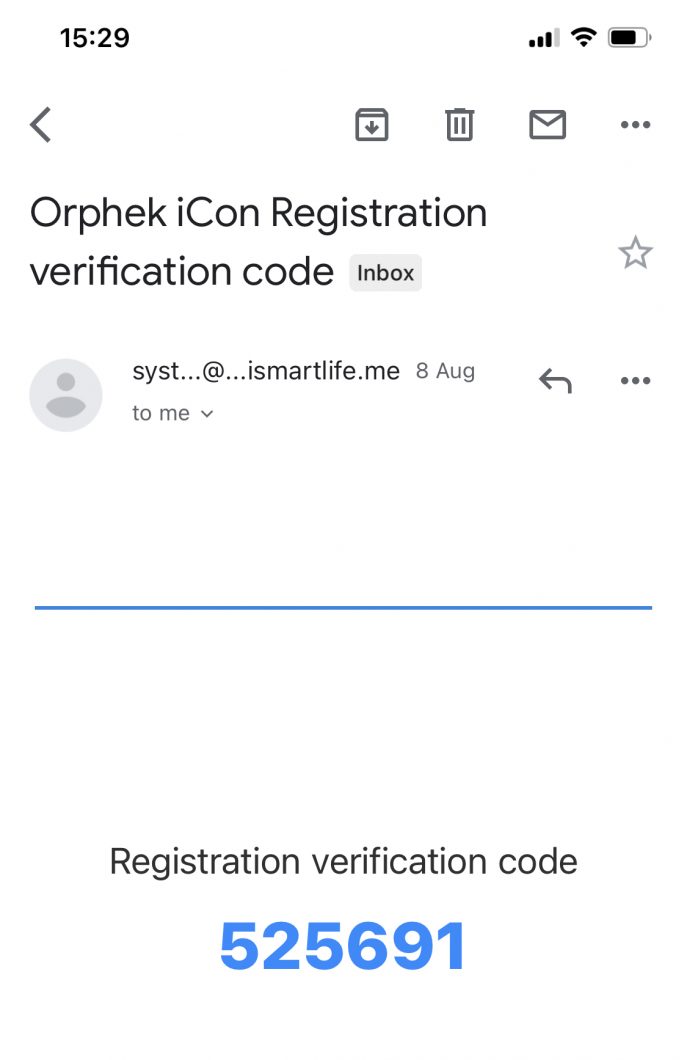
4. Now check your email for the verification code (mentioned above) and copy it.
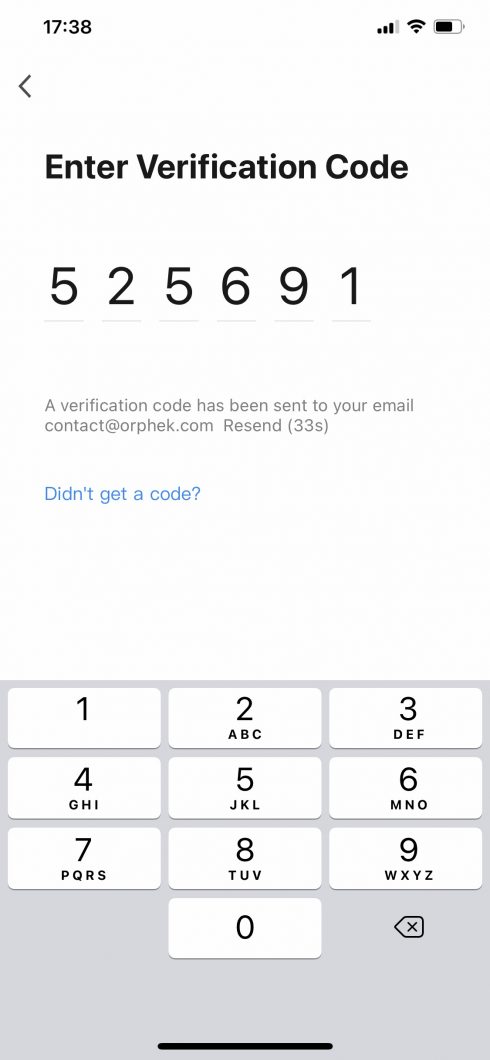
5. Enter the 6 digit Verification Code.
Now you are ready to connect your light. Let’s do it together:
Connecting your device(s)
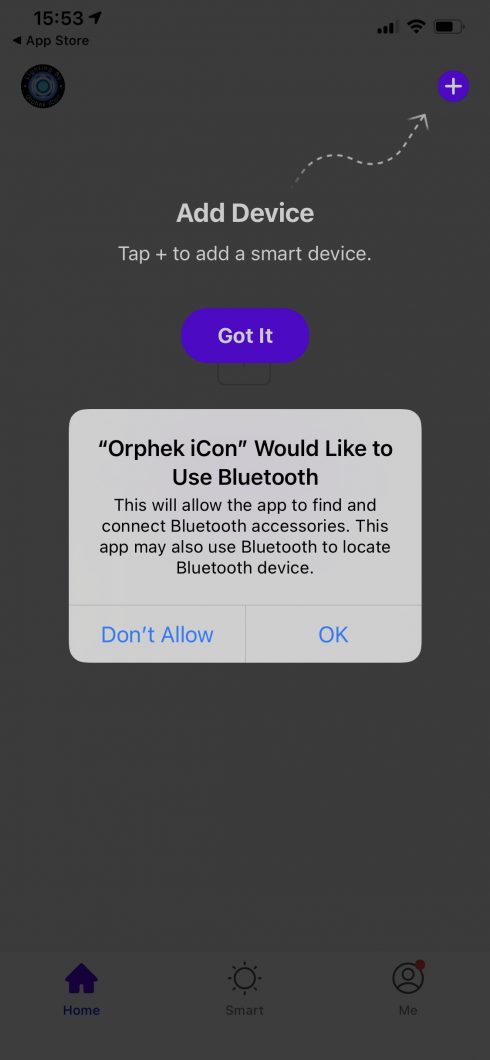
- Allow Orphek iCon App. to use bluetooth by clicking on OK. Orphek iCon is operated by both bluetooth and WiFi.
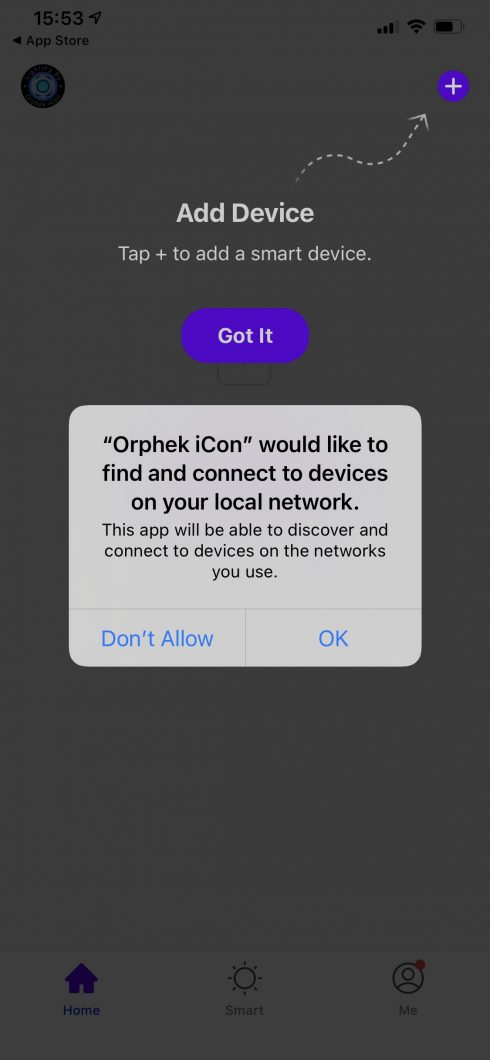
2. Orphek iCon app will be able to discover and connect to your device on your local network when you click on OK.
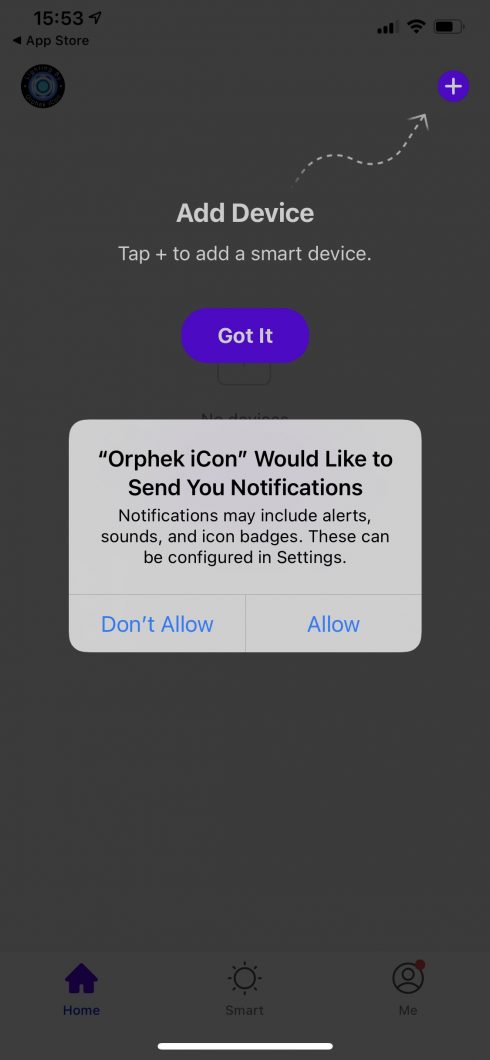
3. Choose the options given for access of your location: ALLOW WHILE USING APP (it is important to allow it otherwise you won’t be able to use the smart device times, weather and time zone information!)
- Add a device by tapping on ADD DEVICE.
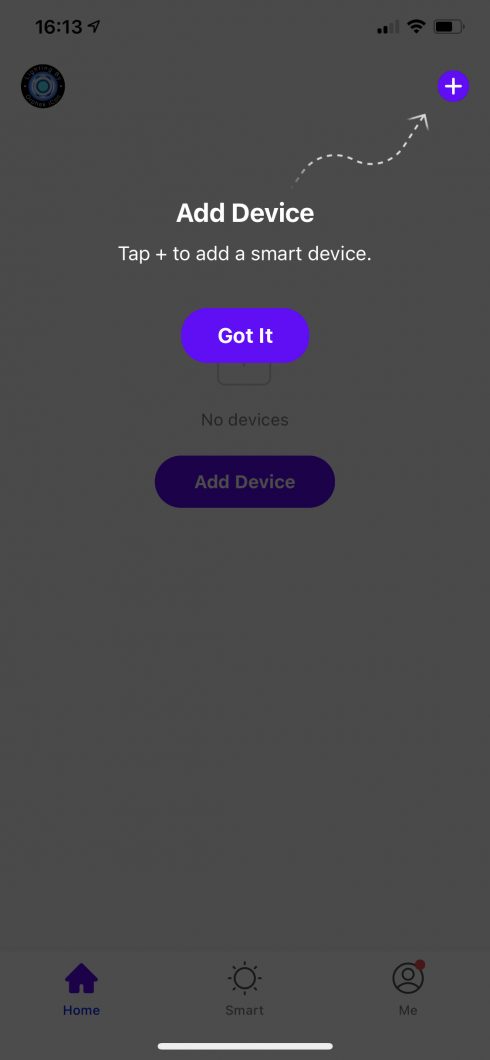
2. Click on GOT It to finish this process.
Once you have connected the light you will proceed by adding it:
Adding your light(s) for the first time
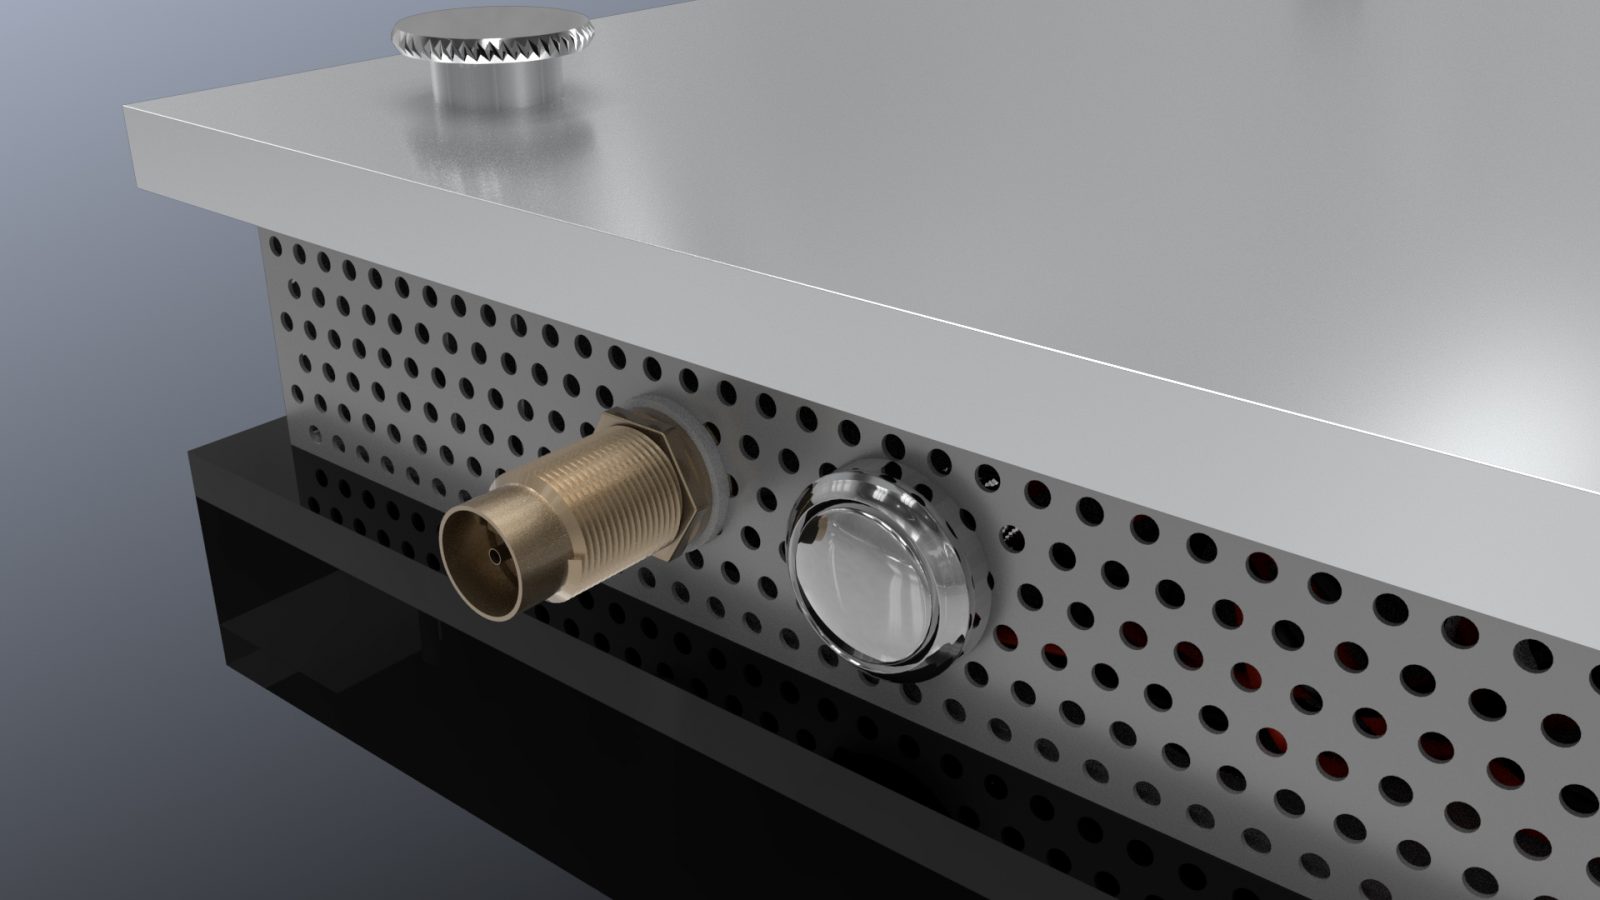
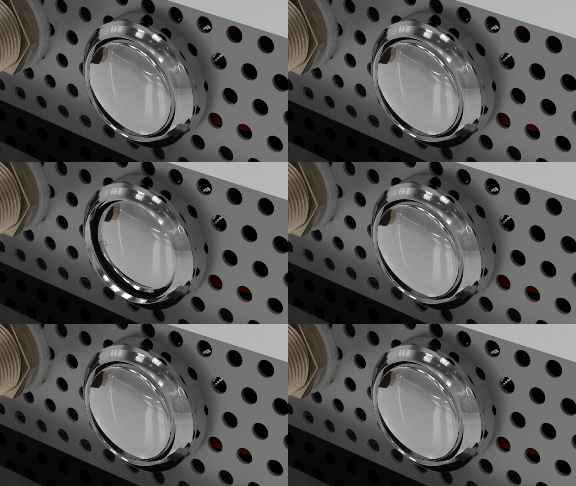
1. Press the Reset Button on the device (light) 4 times for Net Pairing. The Atlantik iCon should flash.
IMPORTANT: You have 1 minute to do the following steps: insert the your Wi-Fi network name (SSID) and password of your Wi-Fi network. After 1 minute, if you did not succeed to complete all the info you will have to press the reset button 4 times again.
2. To add the device tap on the add button “+” at the upper right corner of the screen in the app.
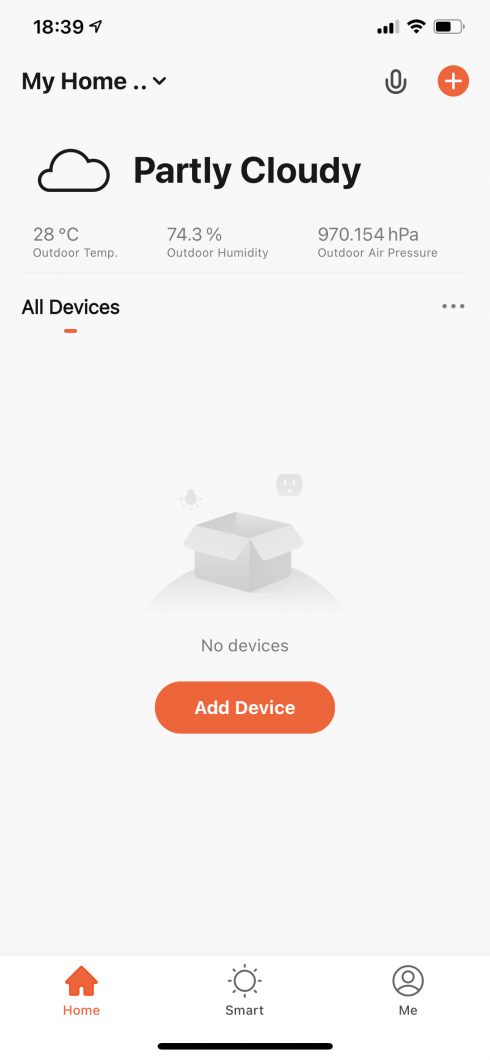
3. Tap Auto Scan to search the Atlantik iCon light(s) .
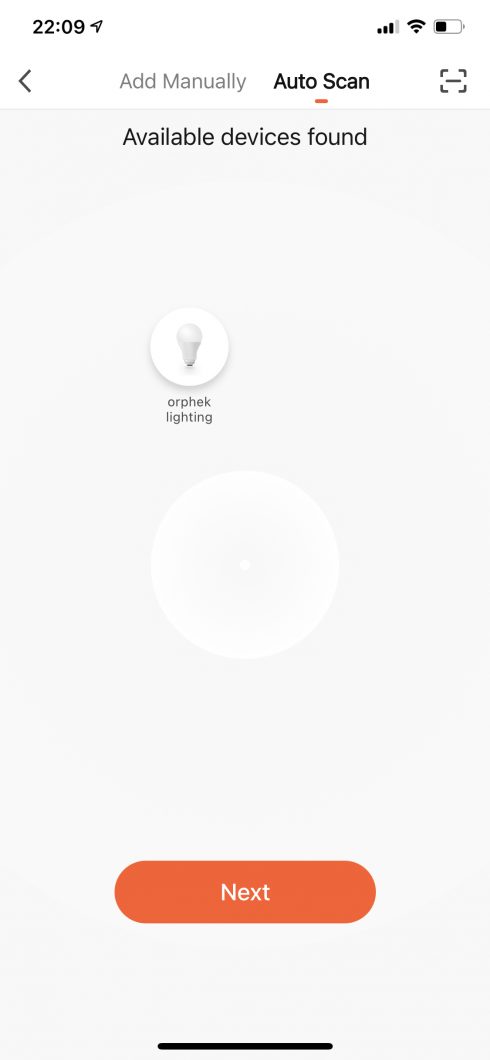
4. Click on NEXT to continue.
5. Choose your Wi-Fi network name for the list and enter the password of your Wi-Fi network and click Next .
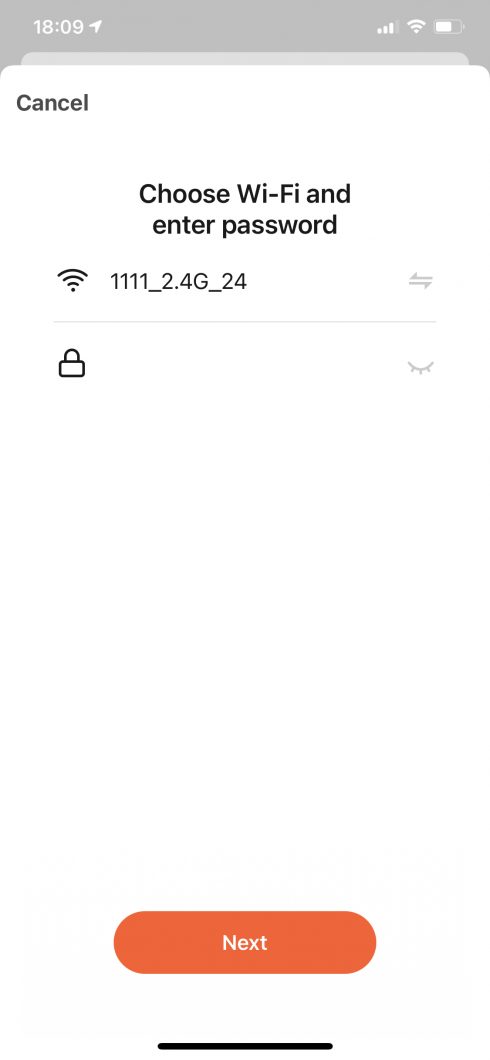
6. The Orphek iCon App. Will start to connect.
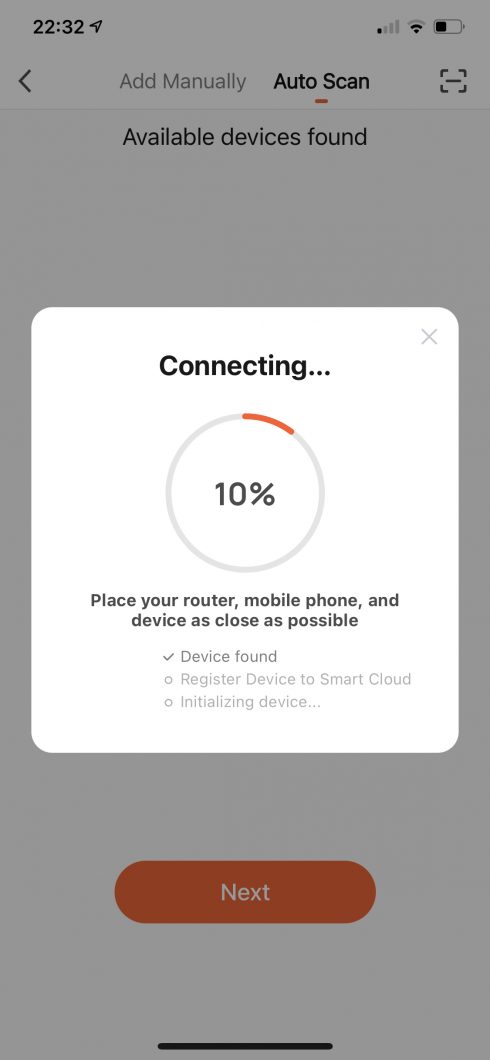
7. Once it is connected it will appear on the screen ADDED successfully”.
8. Click On the Device Light to enter and Program the Atlantik iCon.
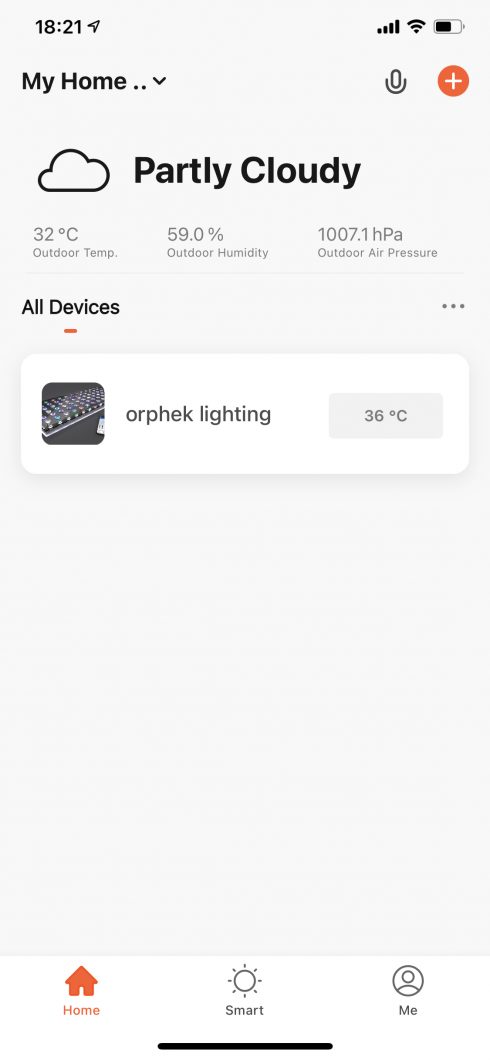
Orphek iCon App
Now you are ready to program your Atlantik iCon(s). Let’s see how to do it, but first get to know the Orphek App:
Orphek has develop a very friendly App., for beginners or advanced reefers.
The App. allows you to program, control, and monitor your light(s) from your cell phone or tablet from local or distance internet network.
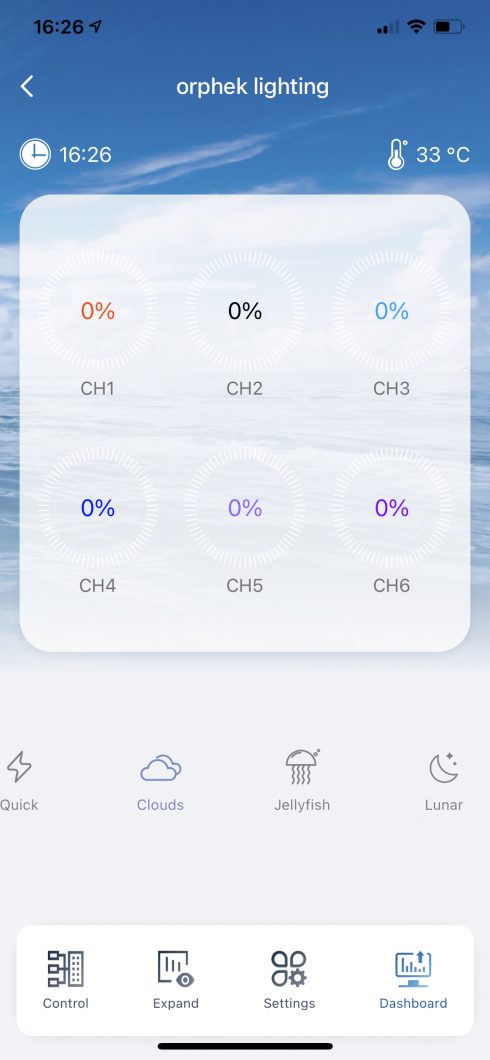
you will see displayed on the screen 04 Functions:
Dashboard/ Control/ Expand/ Settings

Dashboard – Gives you information about:
You can check in which mode your light(s) is(are) running now (the mode icon lighted up is the one that is running now).
which percentage they are running at each Six (06) channel, from Day time 0-100% ,Lunar 0-0.1%
Temperature and time.
Control – Allows you to use Quick for quick light color setting or Program for customize your own program
Quick – Allows you to check the color spectrum and its intensity from 0 to 100% of each of the 06 channels. You can mix colors and choose the combinations that fits you better. There are 2 ways of doing that: modifying each channel one by one or all of them at the same time with the arrow above, by moving it the right.
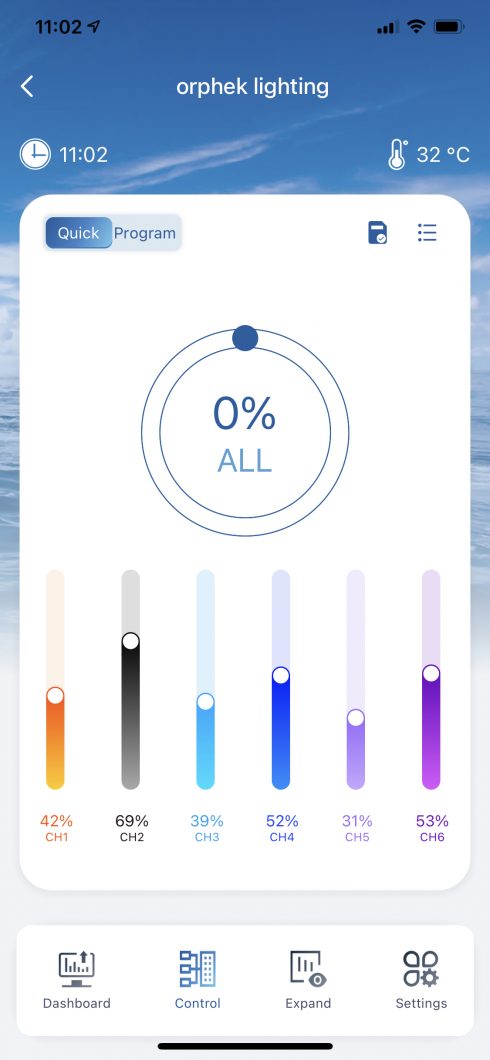
OBs.: Quick will run for 2 hours and after this period of time the light will run back the Program. This is a safety measure in case for example, that you forget the light ON and it will run all night and it could possibly harm your corals. If you wish to turn this function off for any given reason you can do it in Settings by turning on the Auto-recovery. By default is On. Just move the button to the right.
What you can do with Quick set:
1. You can test how your corals respond to a certain spectrum/intensity of color.
2. You can change the color of your corals/tank for taking pictures.
3. You can test mixing color spectrums and intensities to see what fits you better.
4. You can display different colors/intensities that are better suitable for doing maintenance of your tank.
Saving your preferred combination of channels
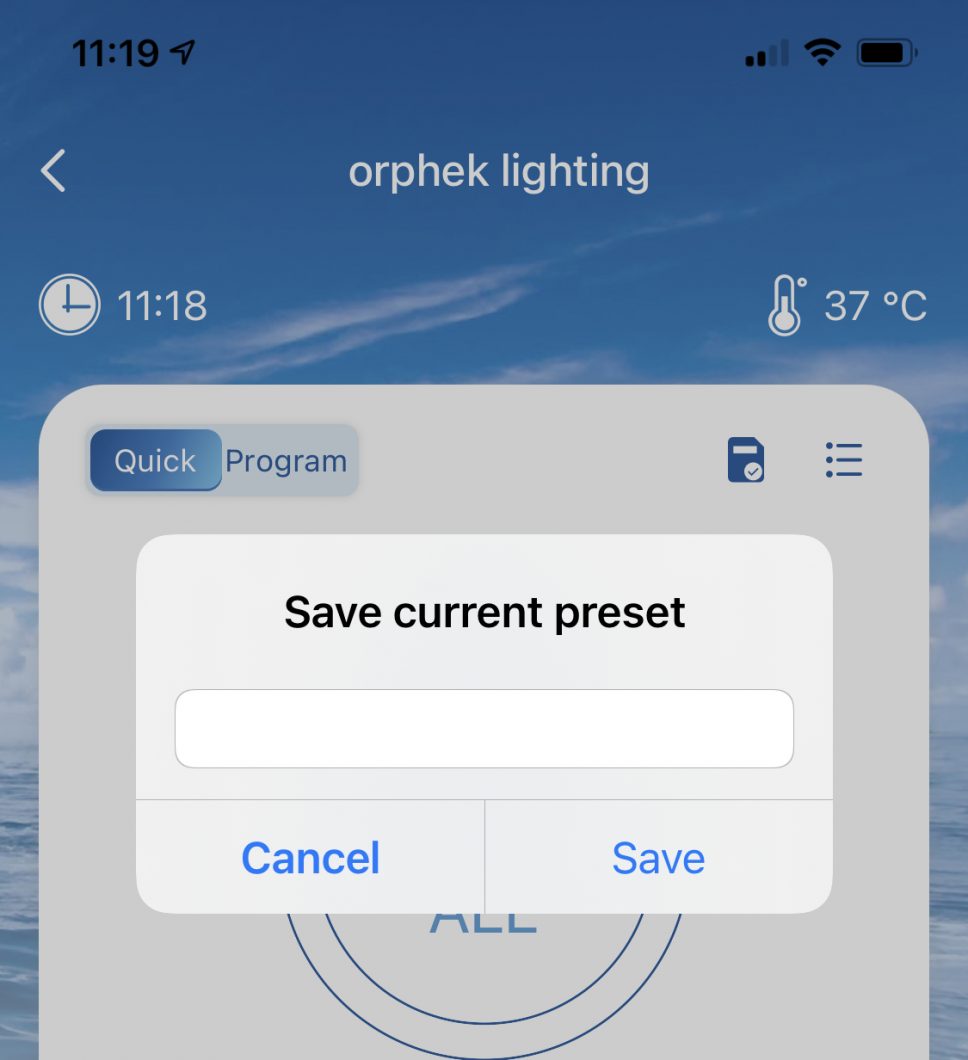
Once you find the perfect combination of the channels you can save it by clicking on the icon on the right up corner.

You will see a pop up window asking you to save current present.
- Give it a name and click on save so you can use it in the future again in case that you decided to change it to another combination.
2. You can make many combinations and save them:
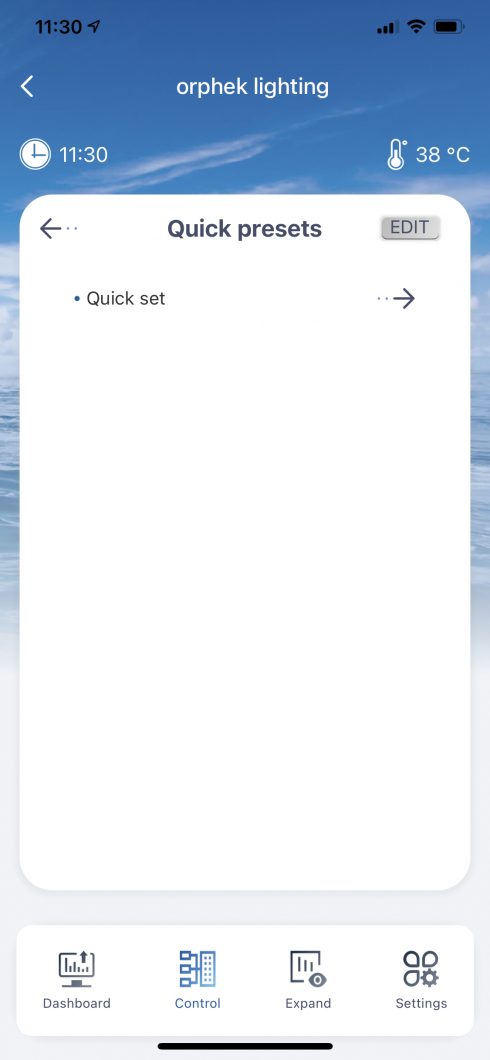
Click on the second icon on the right corner up.

By clicking you will be presented to the list of your combinations. As the screen bellow you can see we named our program (combination of all channels that we build) Blue Plus. You can give any name you want!
Program
Program function allows you to program your lights (you can choose the intensity of light in each channel at a given time) or choose the preexisting program (Helius).
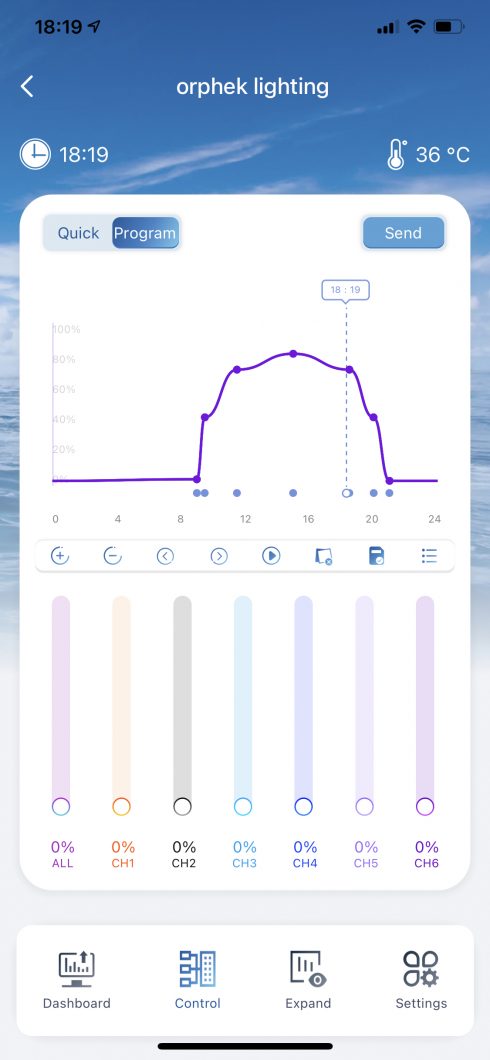
Helius is a program that mimics Nature by providing you the sunrise and sunset and it comes with the Orphek App. and it can’t be erase from your list.
It is the best spectrum recommended by us, that was developed for optimal growth of SPS and LPS according to scientific research of the benefits of sun light for corals.
Once you enter into Program you will see the Helius graph.
As you can see the intensity raises till the highest point and then it goes to sun down. It is a cycle of 12 hours (from 9 a.m. to 21 p.m.)
Find here an example of how to create your own Helius Program
Creating your own program
Orphek brings you an App. that it is very easy to use, so to create sunrise and sunset you will only need to create 3 timing points. Even if it is very easy, let’s do it together ,
You will also find a bar with 5 buttons and 3 icons.
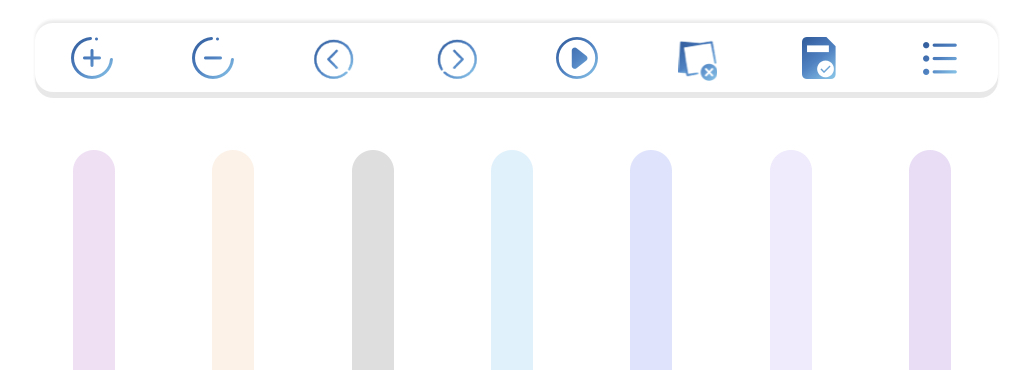
Buttons:
+ and – buttons are used to insert or erase the time points.

< and > buttons are used to make adjustments on the time. (We will explain in details why and how to use them).

>Play shows how your created program will be it shows in 2 minutes 24 hours of your program, so you will check if this is really what you wanted to create and how it looks like).

Icons
First icon from right – Show list of saved program

Second icon – used to save your program.

Third icon – cleaning procedure, so you will be able to start a blank program and create your own.

Atlantik iCon Creating your own program
Creating your own program step by step
1. Click the Clean icon

This is a cleaning procedure, so you will be able to start a blank program and create your own.
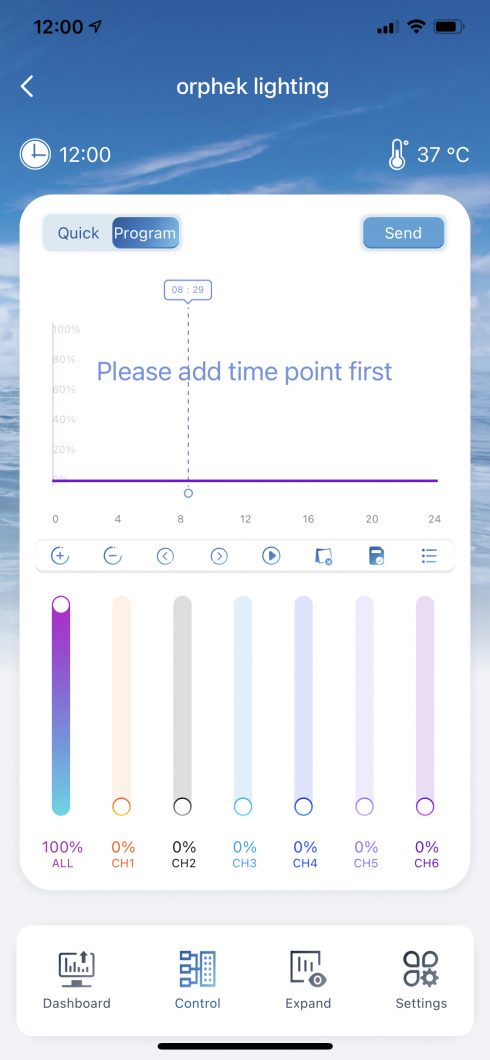
Now that you have a blank graph, you will start from time point 1 (point 1 is the first hour of the day that your will start running your light). We recommend the starting point at 0% so the light intensity will gradually increase starting from zero.
Obs.: the App. comes with smart dimming technology. It means that won’t need to program the gradual increase and decrease of the intensity. The smart intensity dimming technology will do it for you! It means that from time point 1 to time point 2 the intensity will smoothly increase or decrease! It also mean that you don’t need to create many points.
At the graph you will find a time bar and light intensity scale.
The bar time goes from 0:00 to 24:00 and the intensity scale goes from 0 to 100%.
Adding Time Point 1
1. Place the Time Line by moving it left or right on the time bar and leave it at the chosen time.
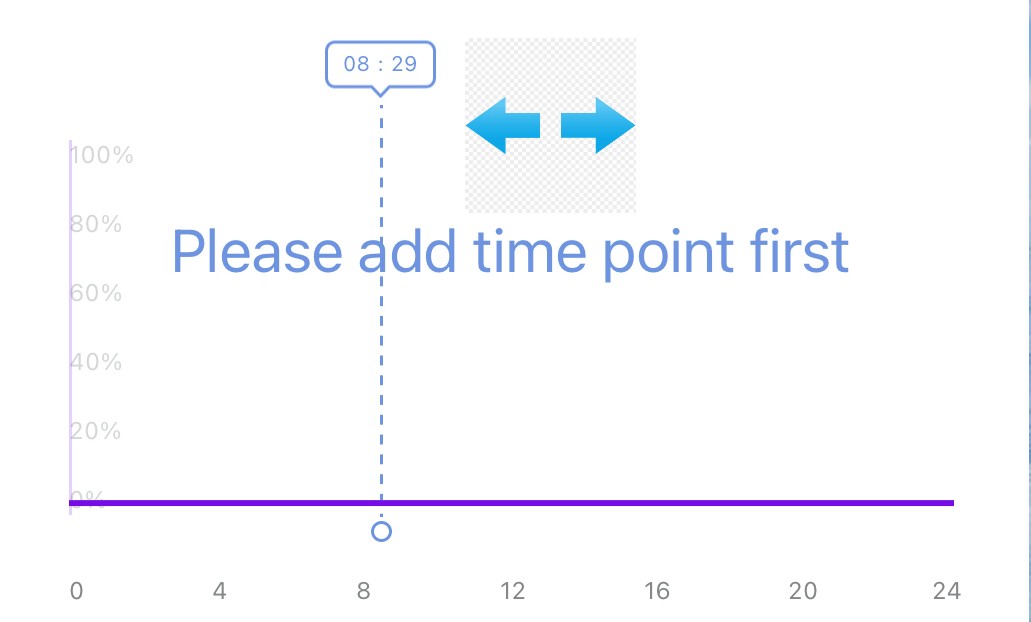
2. Click + button to add the first point at chosen time.
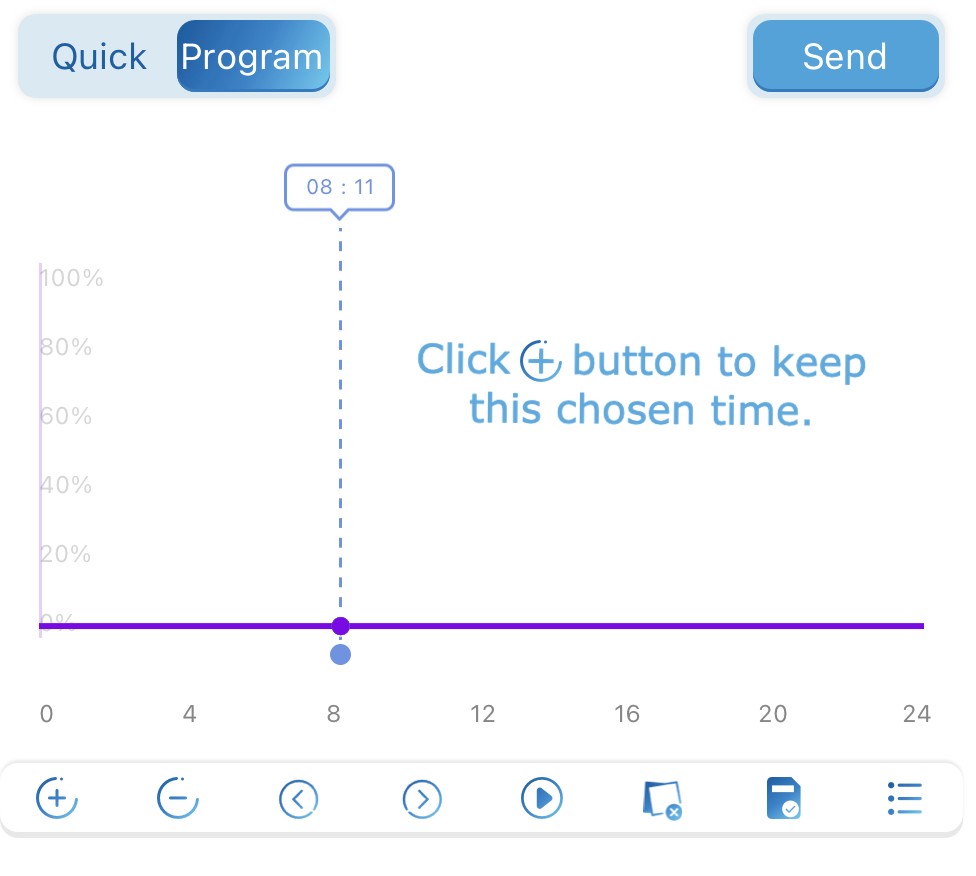
If you decide to change any chosen time, click on the – button. For time adjustments use the buttons < and >. For example, to change from 12:05 to 12:10. Small differences are easier adjusted by using these buttons.
Adding Time Point 2 and Set the Channels light intensity
1. Place the Time Line by moving it left or right on the time bar and leave it at the chosen time.
2.Click + button to add Point 2 at chosen time.
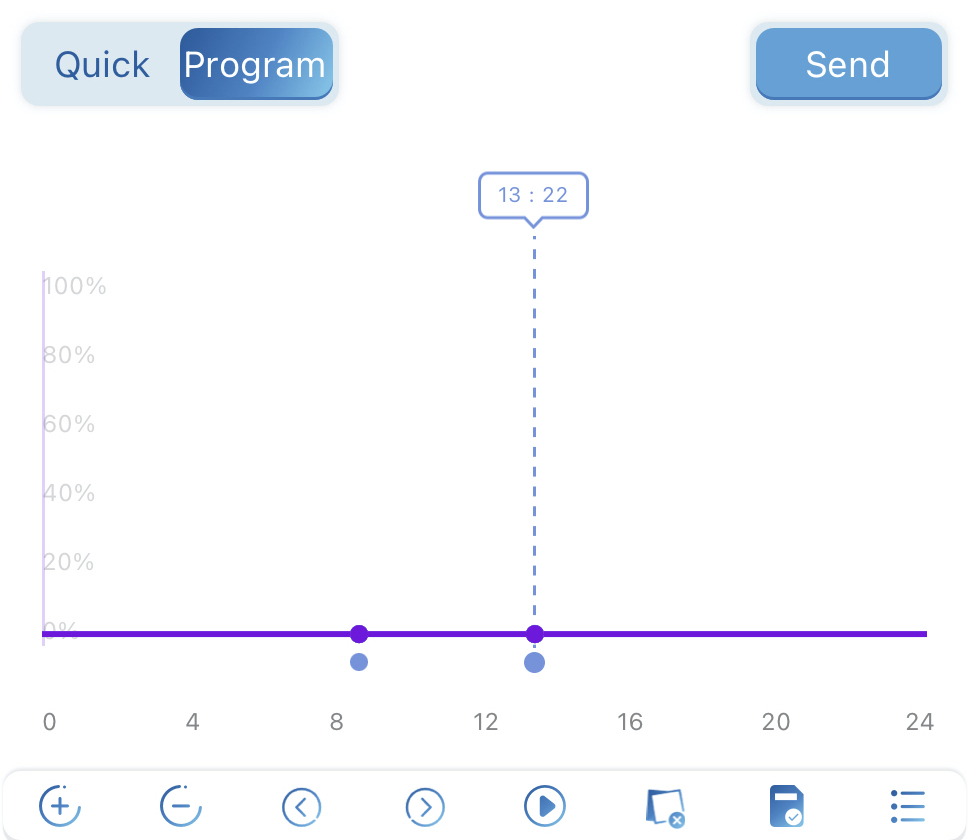
Setting Program Channels light intensity
Now choose the Channels light intensity. Remember that point 1 started at 0%. You can choose the intensity of each channel by moving the button up or down. If you want the same intensity for all channels at this given point, choose the intensity at the ALL button.
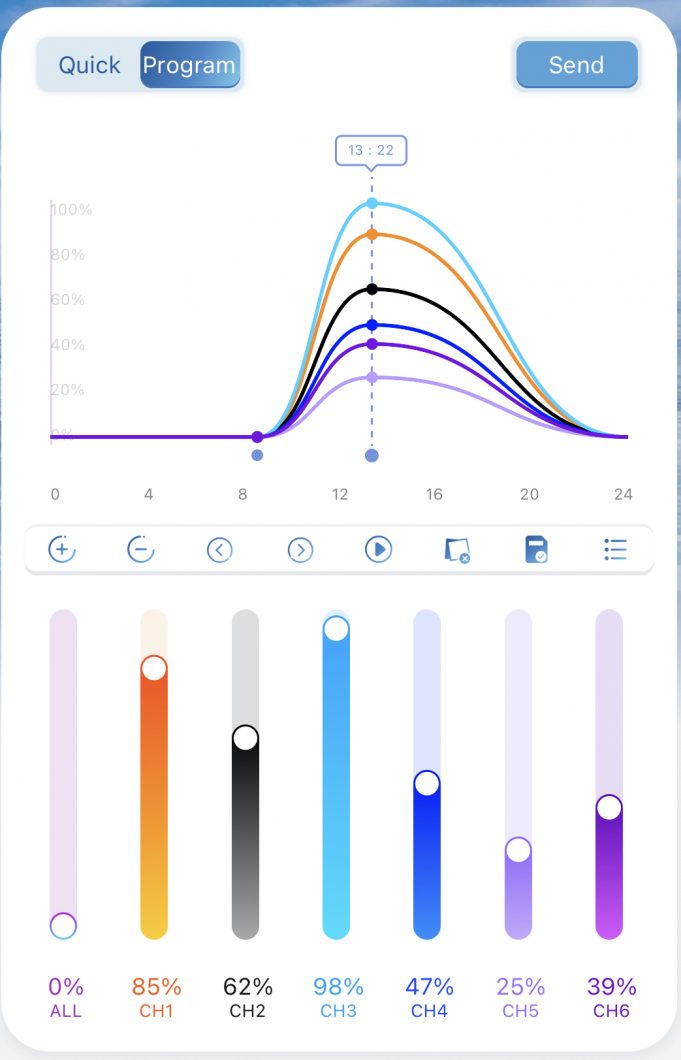
Adding final Time point
It will be the last point created and the last time at the end of sunset which will also be 0%.
1. Place the Time Line by moving it left or right on the time bar and leave it at the chosen time.
2.Click + button to add Point 3 at chosen time. and Set all channels to 0%.
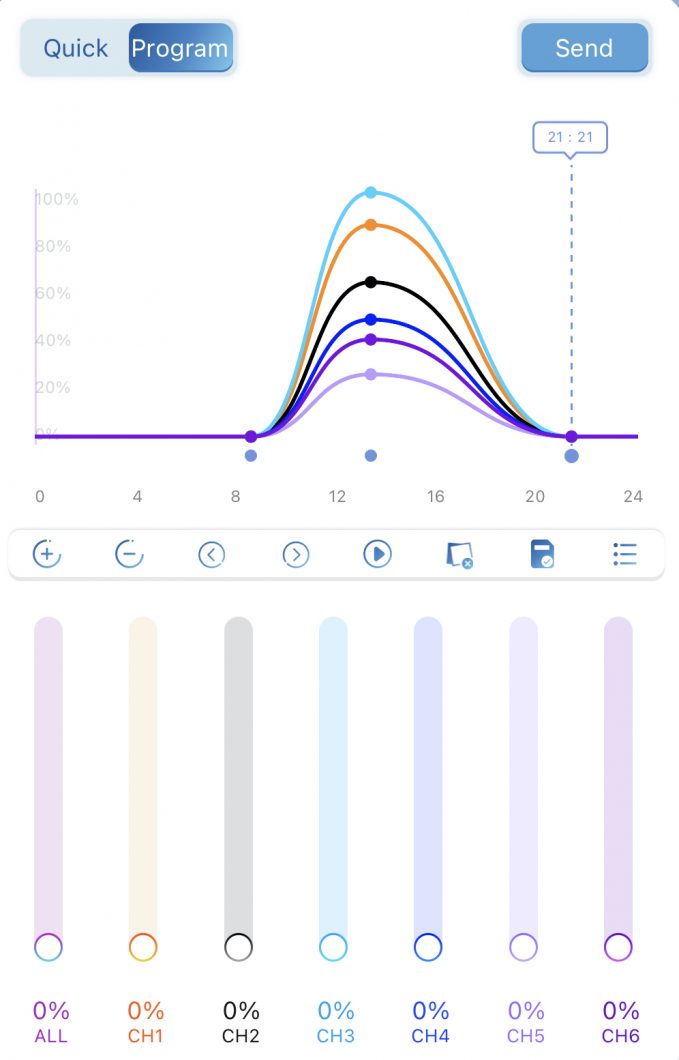
Saving the program you created
You can save the program created by clicking on the Save icon

On the right up corner. You will see a pop up window asking you to save current present. Give it a name and click on save. Remember that you can create many time points, but we explained above that you really need just 3 time points to get it right.
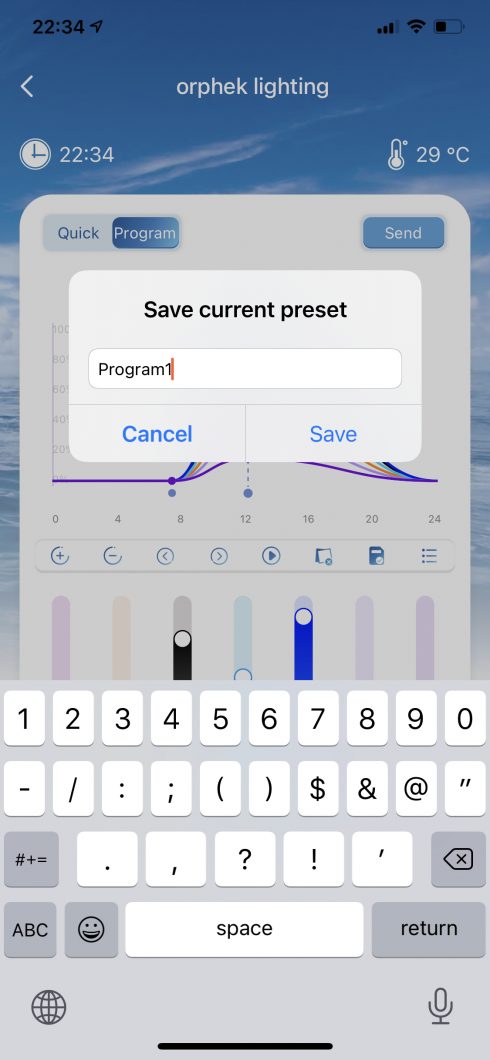
Click SEND button on your up right to send to run the program.
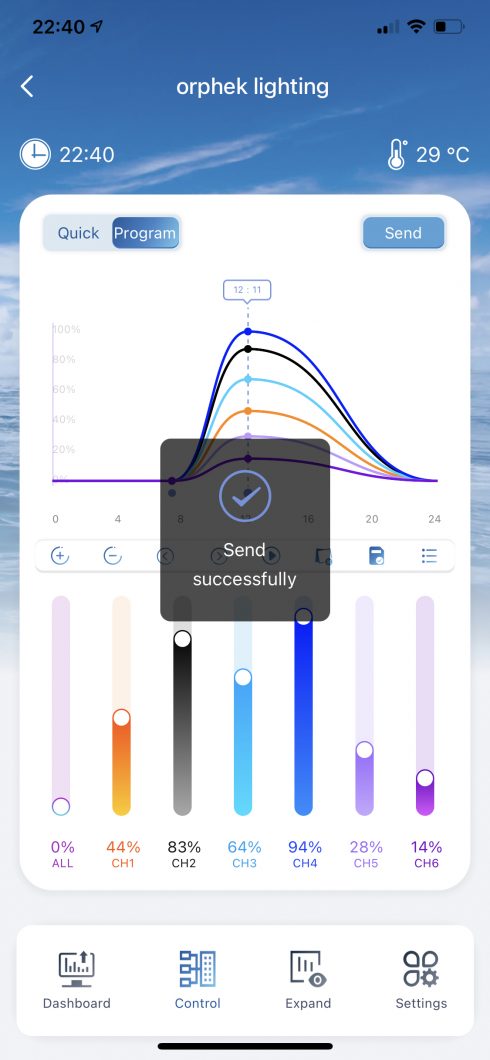
Now that you have created your own program and it is saved in the list of programs you can use this created program, you can use Helius or create more programs and use the one that fits you whenever you want!
Erasing and renaming programs created

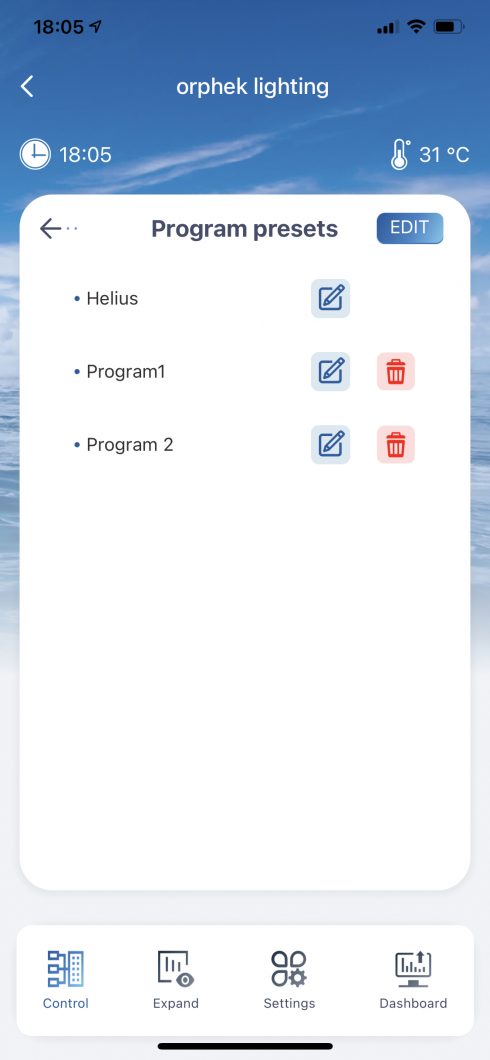
You can also delete programs that you have created and that you no longer have interest in them or rename them in case you changed your mind about the given name.
To erase programs click on the icon trash and erase it.
To rename the program click on the icon with the pencil and rename it.
Expand
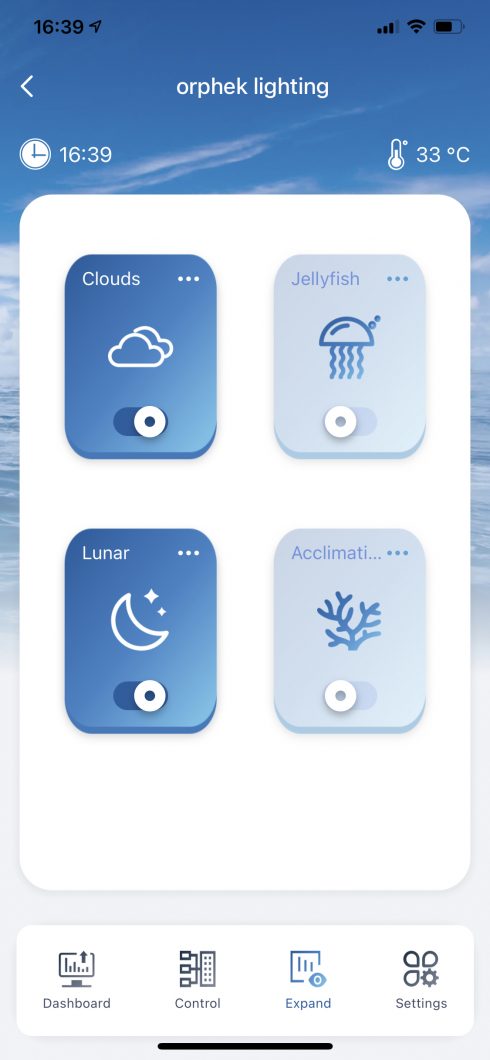
Expand – Shows all the available modes and allows you to enter to each mode to enable/unable and set the running time
Click Expand, you will see another four cool functions: Clouds, Jellyfish, Lunar(Moonlight) and Acclimation.
Clouds
Clouds – Clouds mode allow you to mimic Nature and bring clouds shadowing effect to your tank. It means that your corals will be temporarily under a cloud. The benefit of this mode is to able the corals to relax from light intensity and help color increase vibration.
Orphek created a very natural cloud effect that mimics Nature. It means that the light intensity will slowly decrease and stay lower and slowly increase back to mimic clouds passing in the sky over the sea water.
So if you want “clouds passing over your tank” you can program clouds to pass over your tank from 8 in the morning till 20:00 at the night.
How to do it
Click on Clouds to enter to Clouds program setting.
You can set the start time to run Clouds program and the time it will stop running.
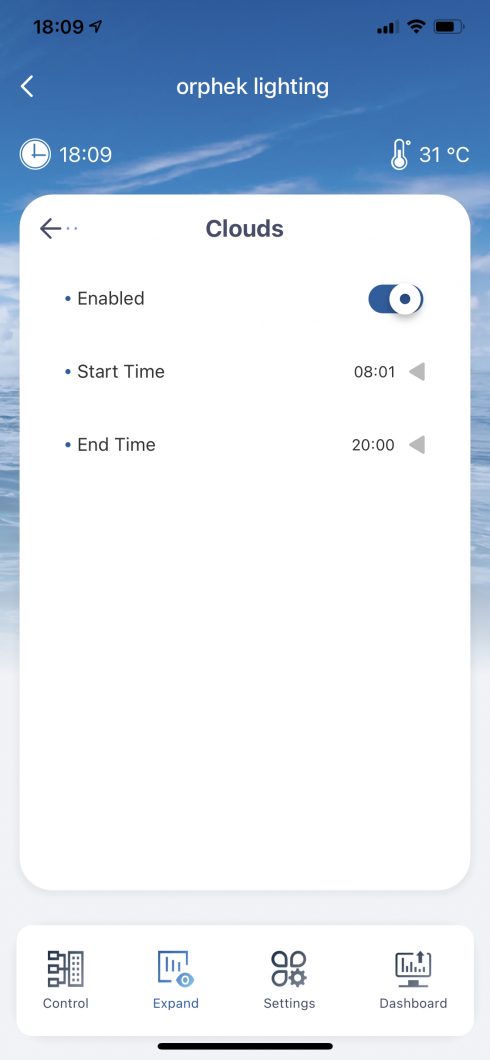
You can set the starting time at 08:01 and 20:00 to turn off the program.
If the time is set incorrectly, it will pop up a message saying “please choose a time between 08:01-20:00”. Please notice that the programed time to shut off Clouds should be always later than the start time.
Let’s say you want “ clouds to pass over your tank” from 13:00hs till 16:00hs to give your corals some time to relax from light intensity.
How the program works:
After setting the running time (13:00hs – 16:00hs) Clouds will run every 15 minutes from 13:00hs until 16:00hs.
Every 15 minutes it will run the cloud effect for 5 minutes.
What will happen during these 5 minutes:
During these 5 minutes, the light intensity will be dimmed slowly to 30% in 1 minute, it will be kept at 30% for 3 minutes and it will slowly go back to the original intensity in 1 minute.30% After the cycle is completed it will be repeated again in 15 minutes. These cycles will be repeated until 16:00hs. After 16:00 the light will go back to run the original program without Clouds.
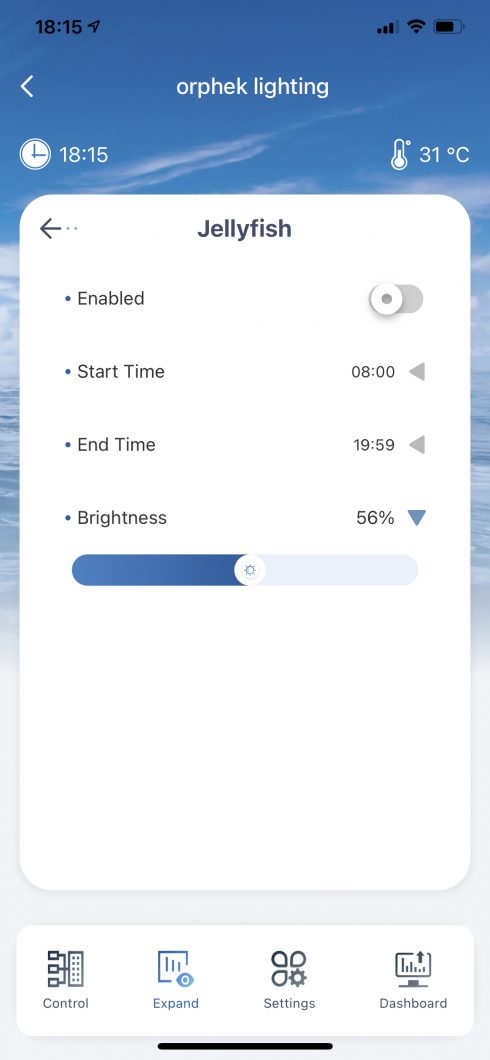
Jellyfish
Jellyfish mode is designed for jellyfish tanks according to their color spectrum and intensity needs.
How to do it
Click on Jellyfish to enter to Jellyfish program setting.
You can set the start time to run Jellyfish program and the time it will stop running and its brightness.
Once you have set the time and brightness the program will run and automatically 41 changes the channels/colors successively until the end time of the program.
Lunar
Lunar – Lunar mode will mimic a lunar light cycle for better coral spawning.
Many coral reef animals show what is known as lunar or semi-lunar periodicity in their breeding efforts. In other words, their spawning peaks once every lunar cycle (usually at full moon) or twice every lunar cycle (at full and new moon). Now you will be able to control this cycle and your corals’ spawning!!
How to do it
Click on Lunar to enter to Lunar program setting.
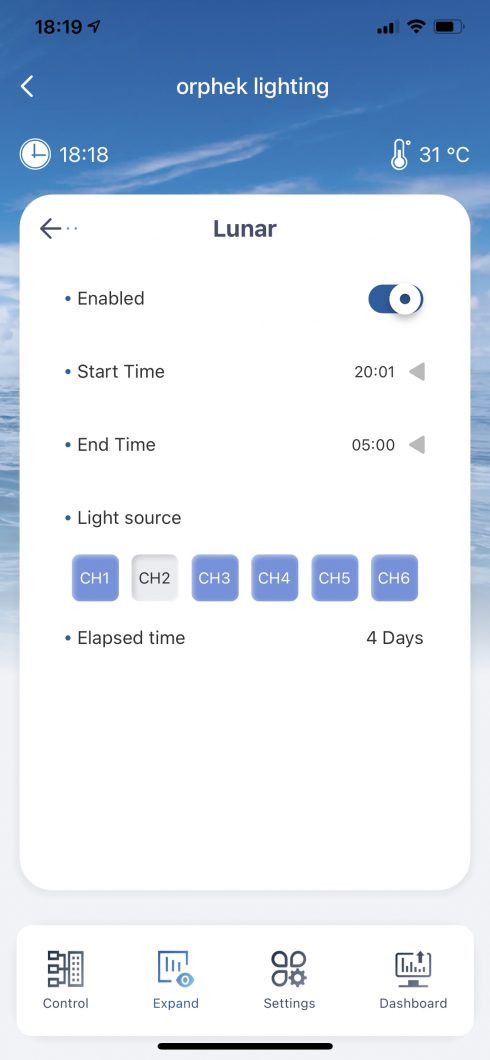
You can set the start time to run Lunar program and the time it will stop running.
You can set the starting time at 20:00 p.m. at the night and 08:01a.m. to turn off the program. The moonlight of the Lunar program runs at night and in the early morning and will last during one month period of time.
This program allows you to choose which channel to run moonlight.
How it works
During a month, the device(light) will start from 0% and each day go up slowly by 0.067% and on the 15th day it go up to 1% and then go down slowly by 0.067% each day and on the 30th day it go down to 0%.
The elapsed time show how many days the moonlight goes.
Acclimation
Acclimation – Acclimation mode helps your corals to slowly acclimate in your tank and
lower the impact of new environmental conditions by gradually adjusting new parameters of color spectrum and light intensity, avoiding stressing the corals.
How to do it
Click on Acclimation to enter to Acclimation program setting.
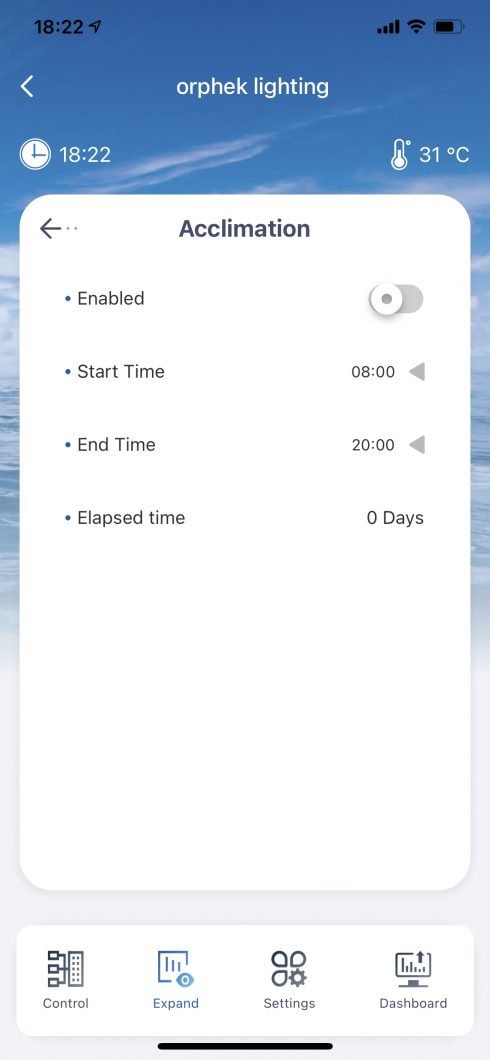
You can set the start time to run Clouds program and the time it will stop running.
You can set the starting time at 08:00 and 23:00 to turn off the program.
You can set the start time and end time and the time range is 08:00-23:00.
If the time is set incorrectly, it will pop up a message saying “please choose a time between 08:00-23:00”. Please notice that the programed time to shut off Acclimation should be always later than the start time.
How it works
Acclimation program will run for 10 days consecutively. On the 11th day, the device(light) will go back to Program mode.
The program starts with Day One when all the channels’ intensity will be on 30%. On the second day it will increase to 33% and so on . Each day the intensity of the light will be increased by 3% till it will reaches 60% on the last day (Day 10).
More things to know about your Orphek App.:
IMPORTANT TO KNOW
You will not be able to run both Lunar and Clouds or both Jellyfish and Acclimation at the same time. If you try to do it, you will receive a message from the App. to turn off one of them.
Settings
Settings – Allows you to set the Atlantik iCon time and more advanced setting
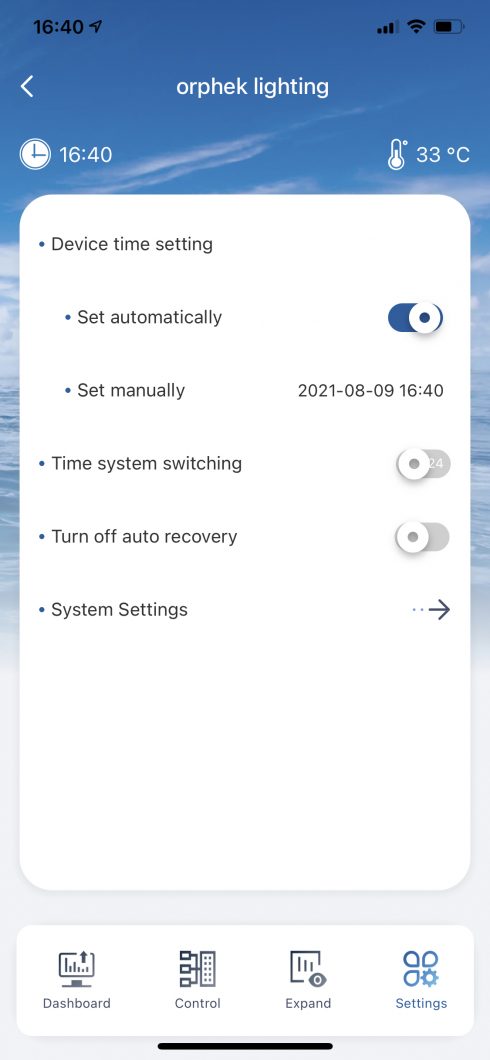
You can set the time in two different ways – Automatically or manually.
Go to settings and move the button to the right if you want to set it automatically or turn this function off and set the time manually.
You can also change time format by moving the button of the time system switch.
Autorecovery – Quick will run for 2 hours and after this period of time the light will run back the Program. This is a safety measure in case for example, that you forget the light ON and it will run all night and it could possibly harm your corals. If you wish to turn this function off for any given reason you can do it in Settings by turning on the Auto-recovery. By default is On. Just move the button to the right.
System settings
System settings allows you to check the information of your light.
You can also able or enable or unable offline notification, which means you will receive or not notification about your light turning off.
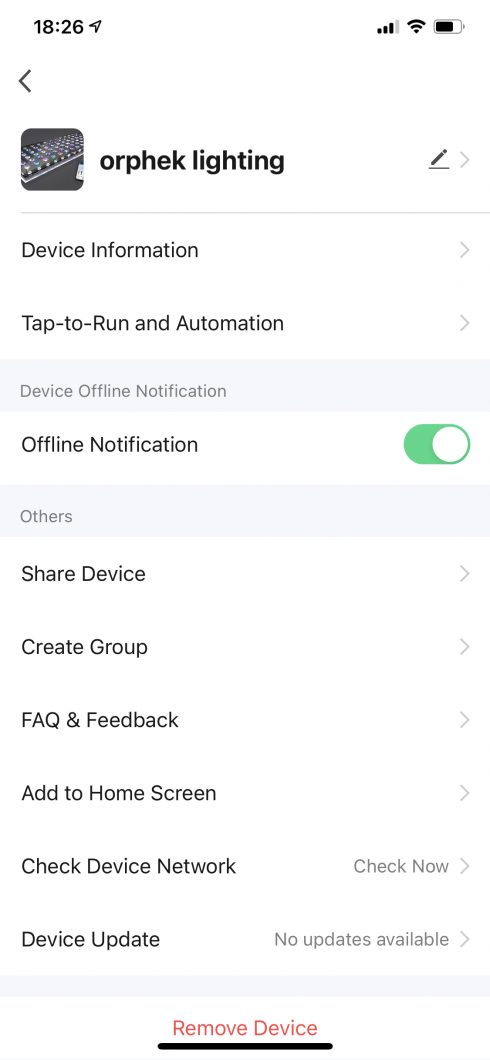
Device information – You will get info on the system, such as IP etc…
Pencil – By clicking on the Pencil you can change the light name and give one that suits you better and place a profile photo,
Share device – If you which to share the access to your light with another device you can do it here.
Create a group – If you have more than one light you can assemble them as a group here and control and program all of them from the same place.
Add home screen – You can see your App. In your home screen through here.
Check device network – You can check the signal and connectivity here.
Device update – It will give you updates automatically of your system that are available.
Remove device – It will reset your light. After that if you wish to reconnect your light please go to the beginning of the manual and do it as it says all over again!
Me – You will add or change your personal information and the time zone that you are and profile photo.
Third party voice service – You can have smart voice control through here.
Home Management – If you want to share the device with other members of your home you can do here. When you add members they will receive an invitation code, Once they receive the code they will be able to see the light and also control it.