Orphek OR4 LED PCB Upgrade Kit & Installation Guide

The OR4 LED PCB Upgrade
Your Orphek OR3 LED Bar is already a fantastic lighting solution, and because Orphek products are built to last, we’re excited to offer you an exclusive opportunity: Upgrade your LED PCB (spectrum) to the latest OR4 technology!
YES! Orphek products are built to last, therefore we are the only company offering UPGRADE possibility of its LED PCB (spectrum).
The OR4 LED Bar series is renowned for its exceptional performance because Orphek uses only best LEDs in the market! If you own the previous generation OR3 LED Bar, this upgrade allows you to experience the cutting-edge advancements of our newest model – the OR4!
Here’s Why You Will Want to Upgrade Your LED PCB (Spectrum):
- Experience Groundbreaking Technology: Orphek is committed to pushing the boundaries of LED lighting. We’ve engineered a sophisticated technology that transforms the OR4 into a revolutionary LED lighting bar, packed with advanced features and performance enhancements never seen before.
- Future-Proof Your Investment: Keep your Orphek OR3 LED Bar at the forefront of aquarium lighting technology. This upgrade ensures you benefit from the latest innovations and optimized performance for years to come.
- Experience Breathtaking Colors & Accelerated Growth: The OR4 upgrade unlocks a new level of color rendition, spectral output, and overall performance. See your corals and aquatic life thrive under the enhanced lighting spectrum.
- Simple and Cost-Effective: Instead of replacing your entire OR3 LED Bar, this upgrade kit provides a cost-effective way to experience the benefits of the latest OR4 technology.
Key Features of the OR4 LED PCB Upgrade
Experience Orphek Lighting Innovation:
- Enhanced Spectrum Output with Orphek proprietary 6W Mixed Colors Dual Chip LED: Orphek is the first and only company in the reef LED lighting market to design each 6-watt Dual-Chip LED with two different mixed LED nm colors, creating this technology that enhances the spectrum output, resulting in improved coral health, growth and coloration & LED durability.
- Optimized Light Distribution with proprietary new reflectors: The new proprietary 70° reflectors are designed for peak efficiency and beam precision, providing superior PAR coverage and focused light distribution with minimal light spillage.
More Upgrades – Get even more from your OR4 LED Bars: Upgrade also to OR4’s New Operating System!
Here’s Why You Will Want to Upgrade Your Operating System (iCon Technology):
Unlock the Full Potential with Orphek iCon Dim Driver Series
Want to take your upgraded OR3 LED Bar to the next level? Unlock unparalleled control and precision with the Orphek iCon Dim Driver Series! Engineered by Orphek’s experts, these cutting-edge drivers offer seamless dimming capabilities, allowing you to fine-tune the lighting spectrum to perfectly match your aquarium’s needs.
Imagine:
Effortless Control: Precisely adjust the intensity and color of your lights for optimal coral growth and vibrant colors.
Realistic Sunrise/Sunset Simulations: Create natural lighting transitions that mimic the natural environment, reducing stress on your aquatic life.
Enhanced Energy Efficiency: Optimize power consumption while maintaining peak performance.
About/ Purchase Orphek iCom Dim Driver – Go to Orphek Online Shop
*Compatibility: The iCon Dim Driver Series is compatible with all OR3 60/90/120/150 LED Bar models. Note: The iCon Dim Driver Series is sold separately.
Orphek OR4 LED PCB Upgrade Kit Installation Guide
THANK YOU FOR PURCHASING ORPHEK OR4 LED PCB UPGRADE KIT!
This guide provides step-by-step instructions for upgrading the LED PCB in your Orphek OR3 LED Bar to the latest OR4 LED technology.
We’re confident this upgrade will enhance your lighting system’s performance for years to come!
If you have any questions during the process, please don’t hesitate to contact us at contact@orphek.com
Before You Begin
Your OR4 PCB Upgrade Kit comes with:

01 OR4 LED PCB / A specific number of LED reflectors, tailored to each OR4 model:
- OR4 60 – 18 reflectors + 1 extra
- OR4 90 – 24 reflectors + 1 extra
- OR4 120 – 36 reflectors + 1 extra
- OR4 150 – 42 reflectors + 1 extra
- Extra Screws
- Extra Allen key
You will also need the following items (not provided by Orphek or included in this K):
1. Tools such as Screwdrivers: (Various sizes to match the screws in your OR3 LED Bar). Gather all the necessary tools before starting. If you’re not comfortable with this type of procedure, we recommend consulting a qualified technician.
2. Soft Cloth or Towel: To protect the OR3 LED Bar’s finish.
3. Small Containers or Bags: Organization is the key to your success! As you disassemble the unit, keep screws and small parts organized. Using small containers or labeled bags can be helpful.
4. High-Quality Thermal Paste: You’ll need to source high-quality thermal paste for optimal performance.
5. 99% Isopropyl Alcohol (or Thermal Paste Cleaner): It is recommended to have 99% isopropyl alcohol to clean the heatsink.
Obs.: Orphek doesn’t supply thermal paste or cleaning products, nor can we advice on specific brands. We recommend purchasing a high-quality thermal paste to ensure your equipment stays protected.
6. Camera or Smartphone: To take reference photos during disassembly (highly recommended). These photos will be valuable when reassembling the unit.
Also Before You Begin
- Take Your Time: Follow these instructions carefully and completely. Avoid skipping steps.
- Workspace: Choose a clean, dry, and stable surface to work on. Protect your OR3 LED Bar by placing it on a soft cloth or towel.
- Safety First: Ensure your OR3 LED Bar is unplugged and disconnected from any power source. Wipe down the unit, connectors, and cables with a clean cloth to remove any dust or debris.
STEP 1: DISASSEMBLY OF YOUR ORPHEK OR LED BAR
Now that you have gathered all the necessary items and have reviewed the basic instructions above, you are ready to begin!
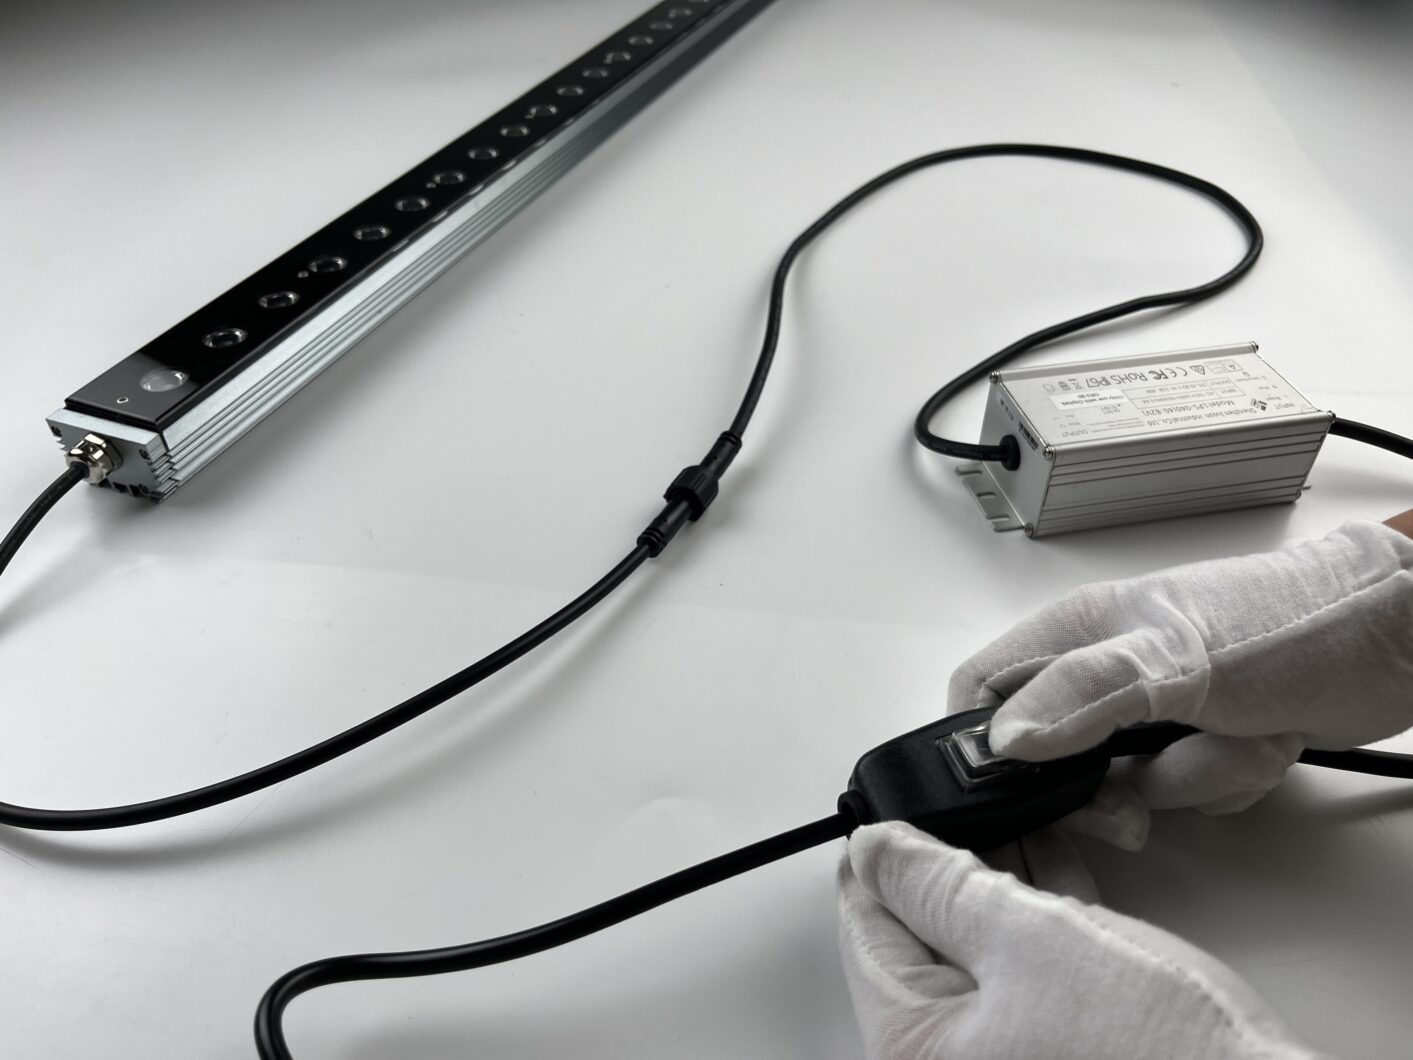
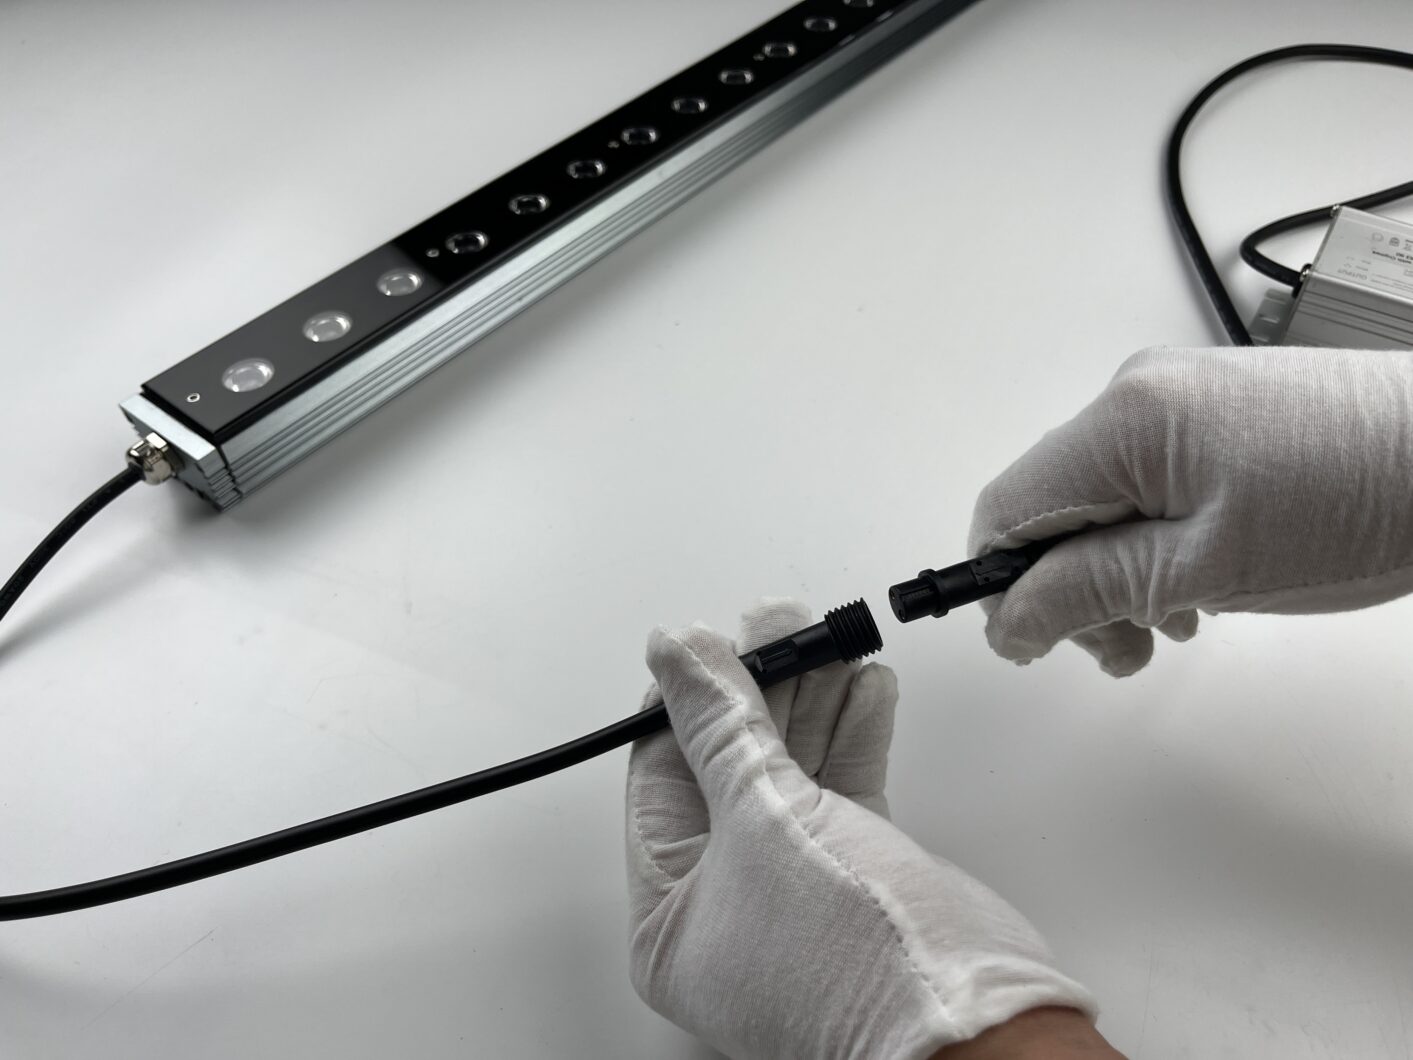
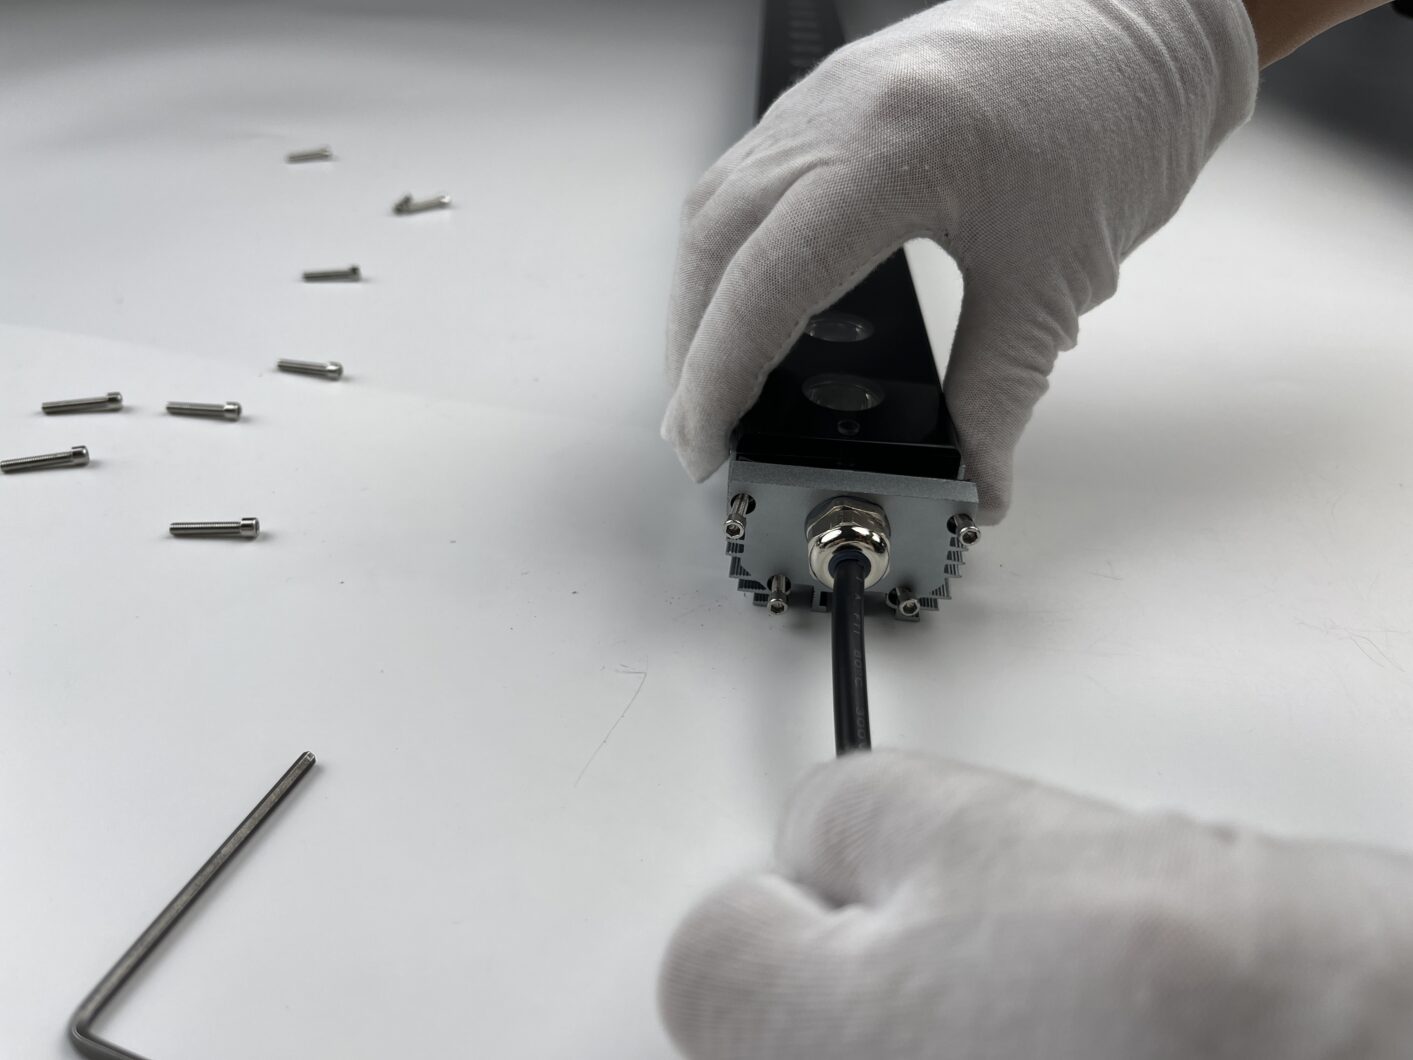
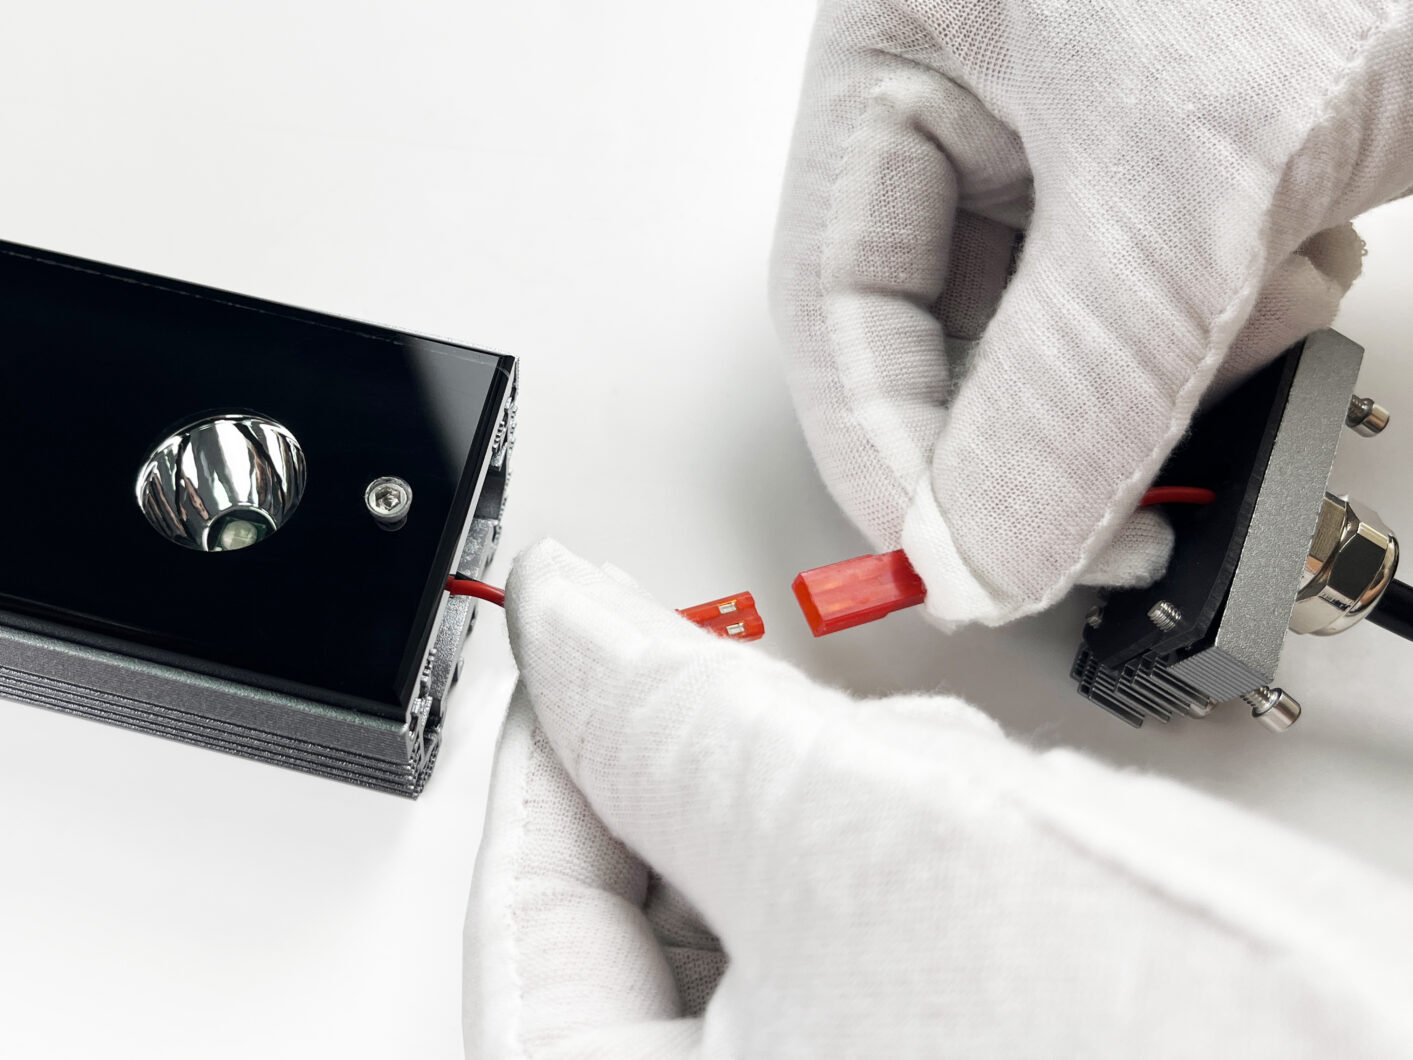
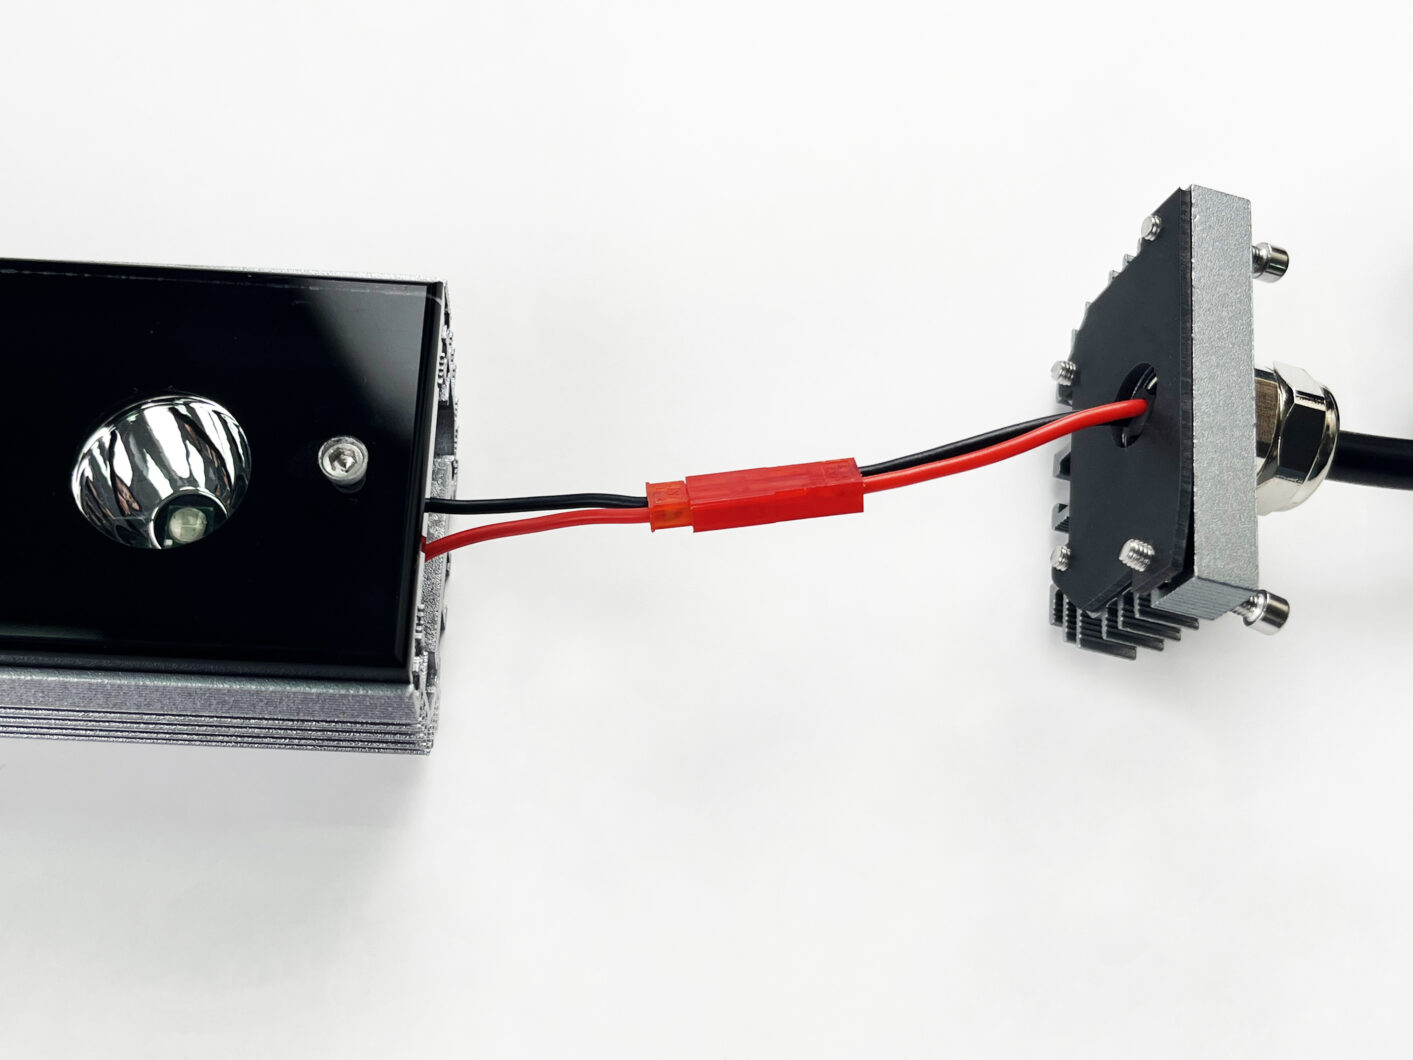
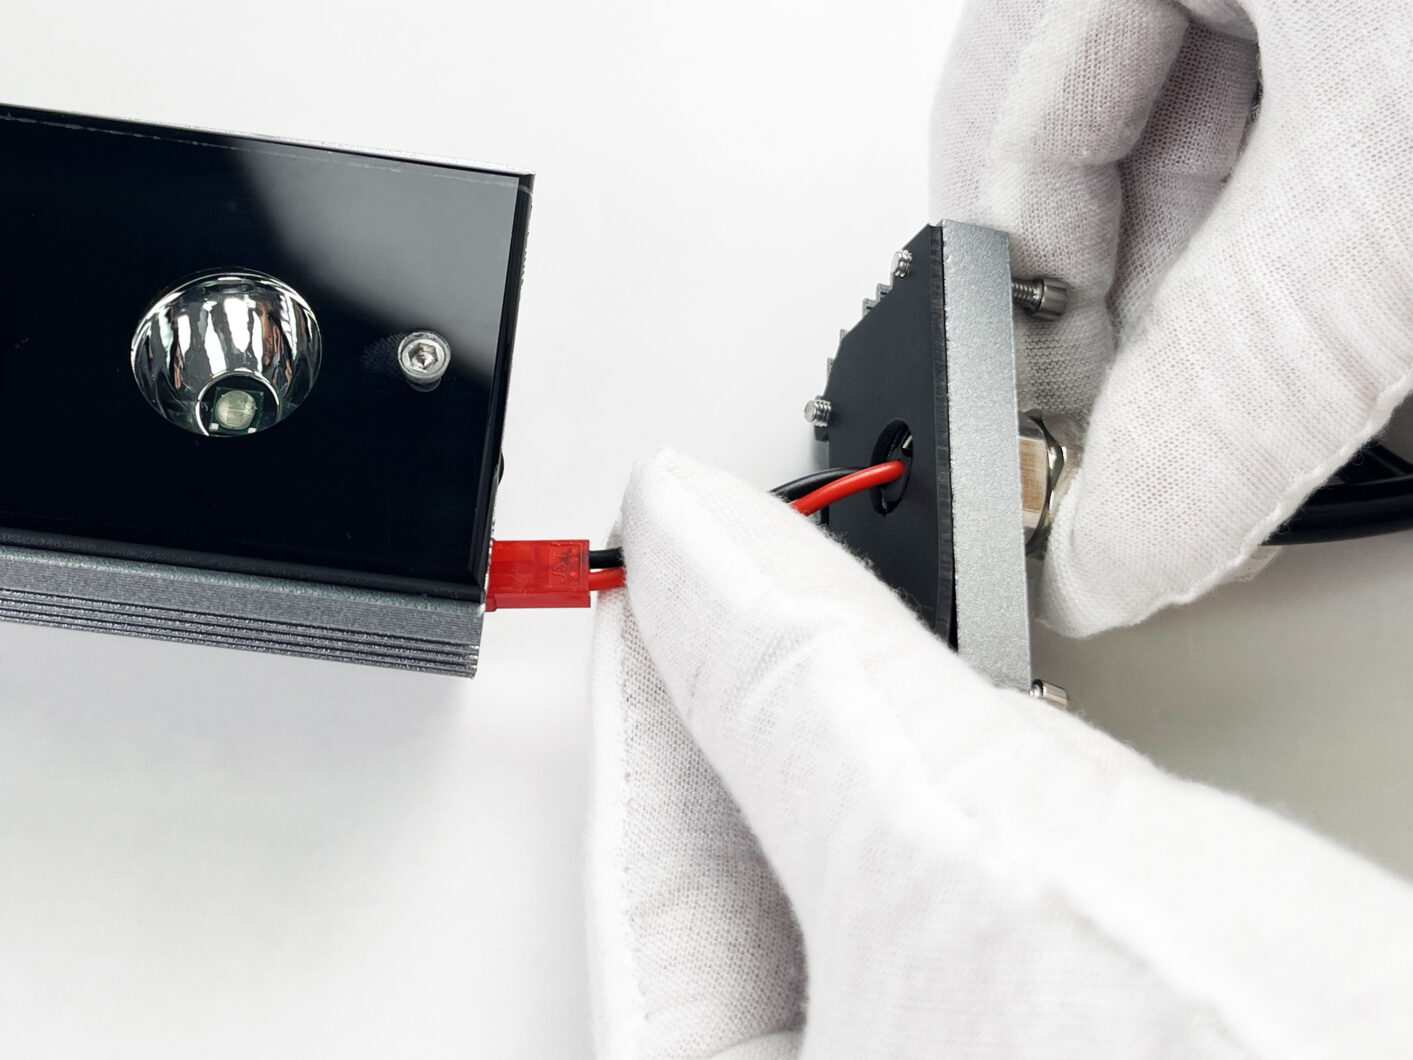
Disconnect Power: Switch off and unplug your OR3 LED Bar. Disconnect the power connectors as shown in photos 1 & 2.
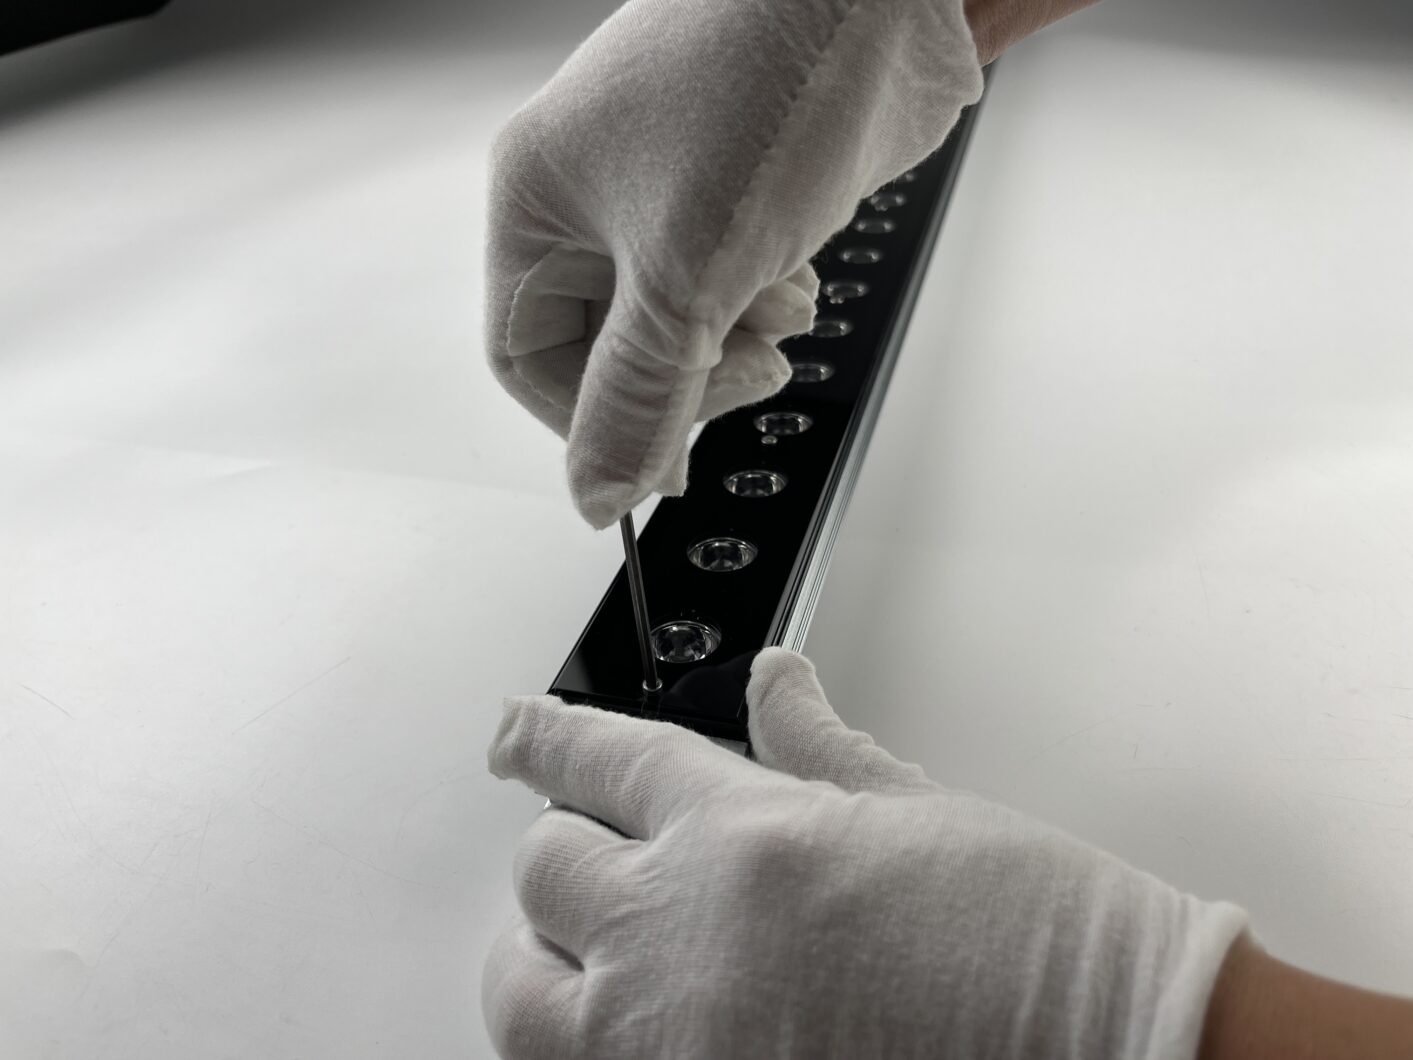
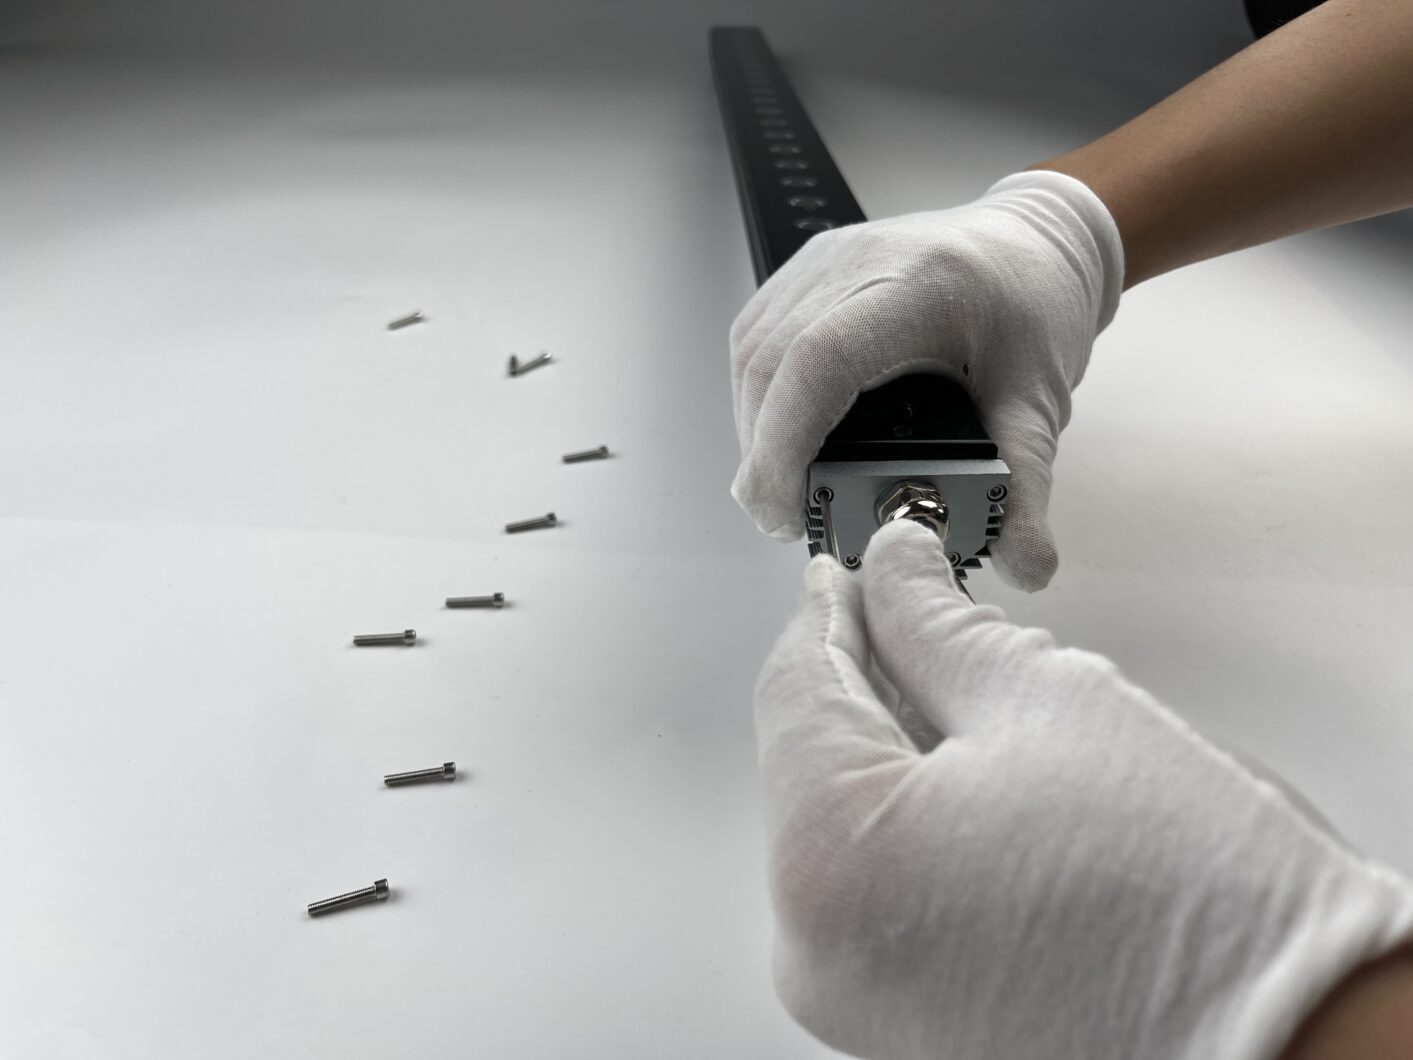
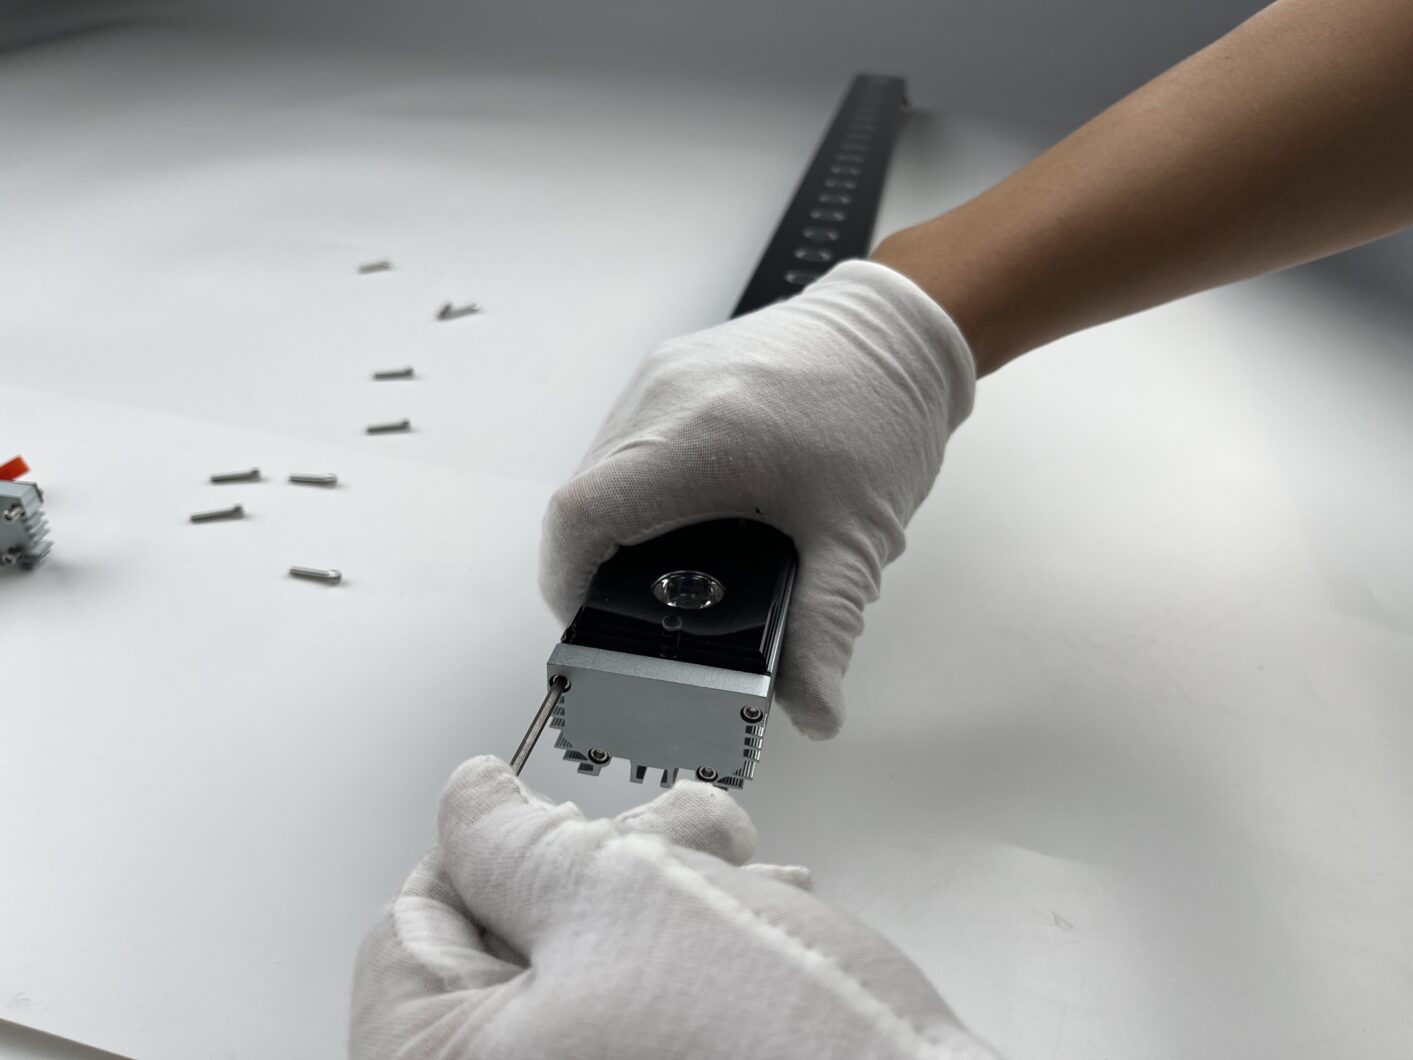
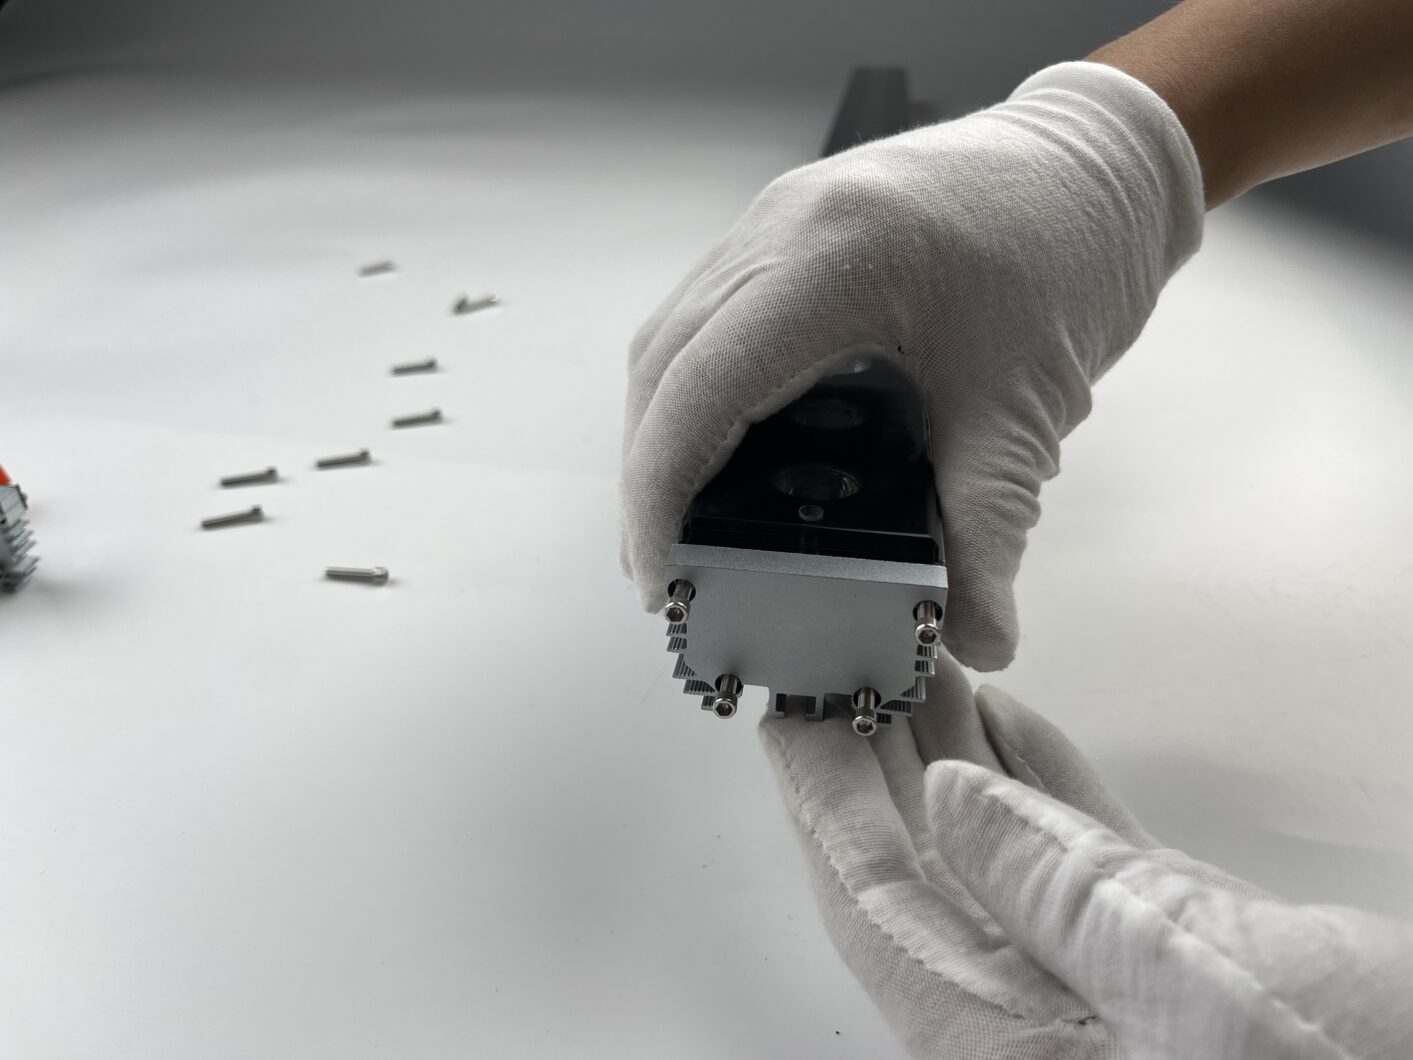
Remove Top Acrylic & Side Caps: Unscrew all screws on the top acrylic and the aluminum side caps (Figures 3 & 4). Caution: Handle the acrylic sheet carefully to avoid scratches.
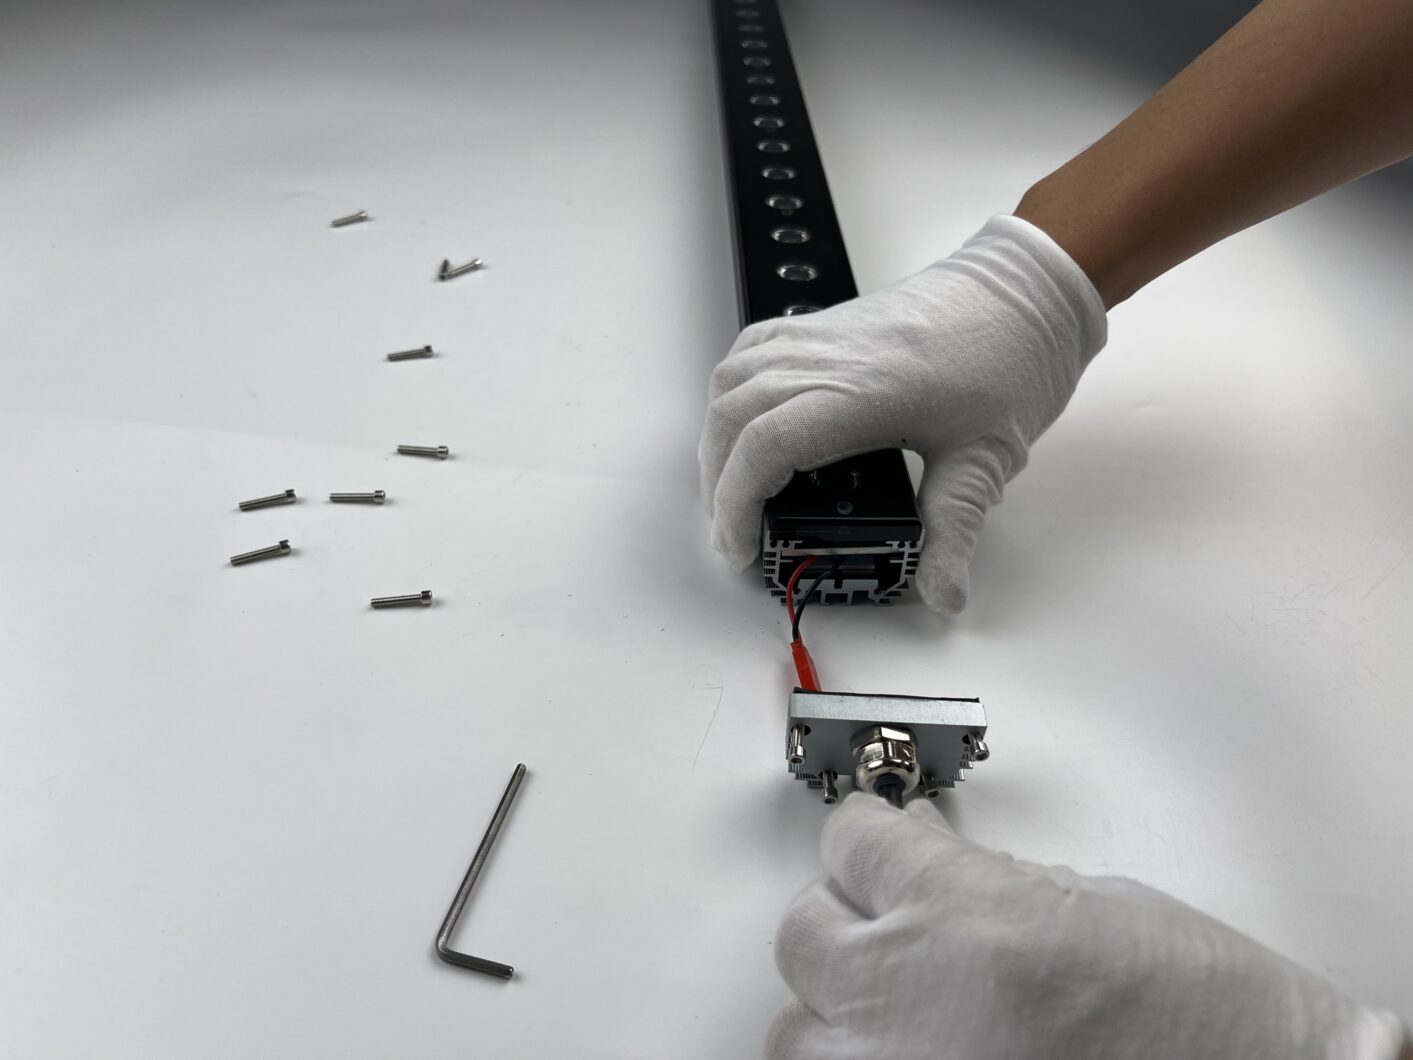
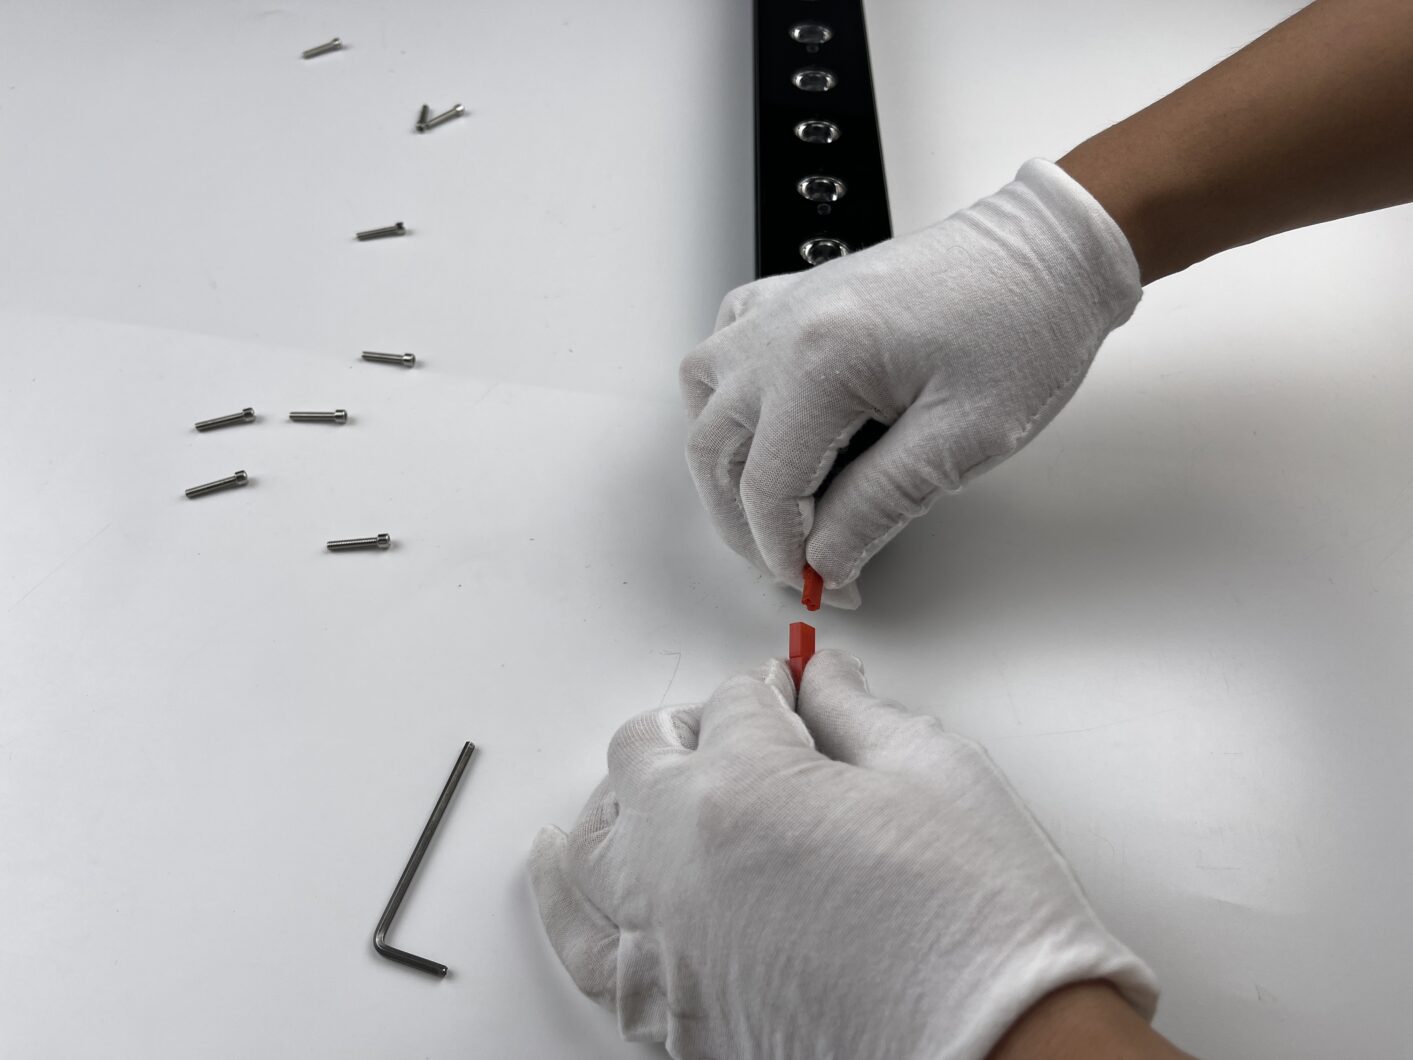
Remove Side Cap & Disconnect Connector: Carefully remove one aluminum side cap. Disconnect the internal red connector (Photos 5, 6 & 7).
Remove Remaining Side Cap: Unscrew the remaining aluminum side cap – located on the opposite end of the bar(Photo 8).
Remove Top Acrylic: Carefully remove the top acrylic sheet and set it aside in a safe place (Photo 9).
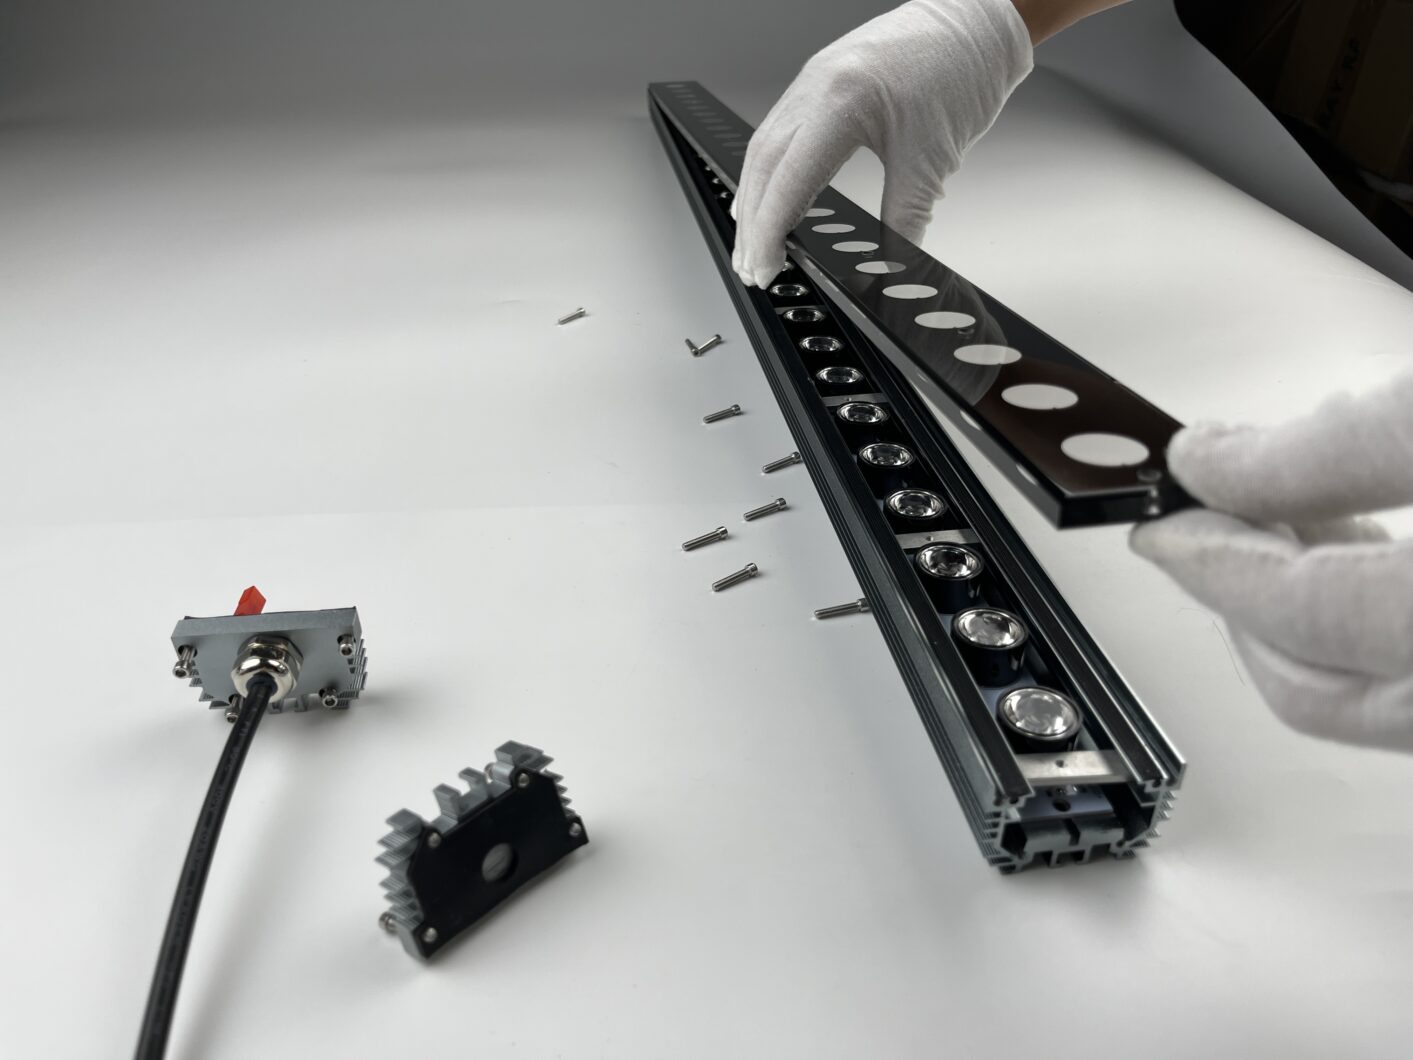
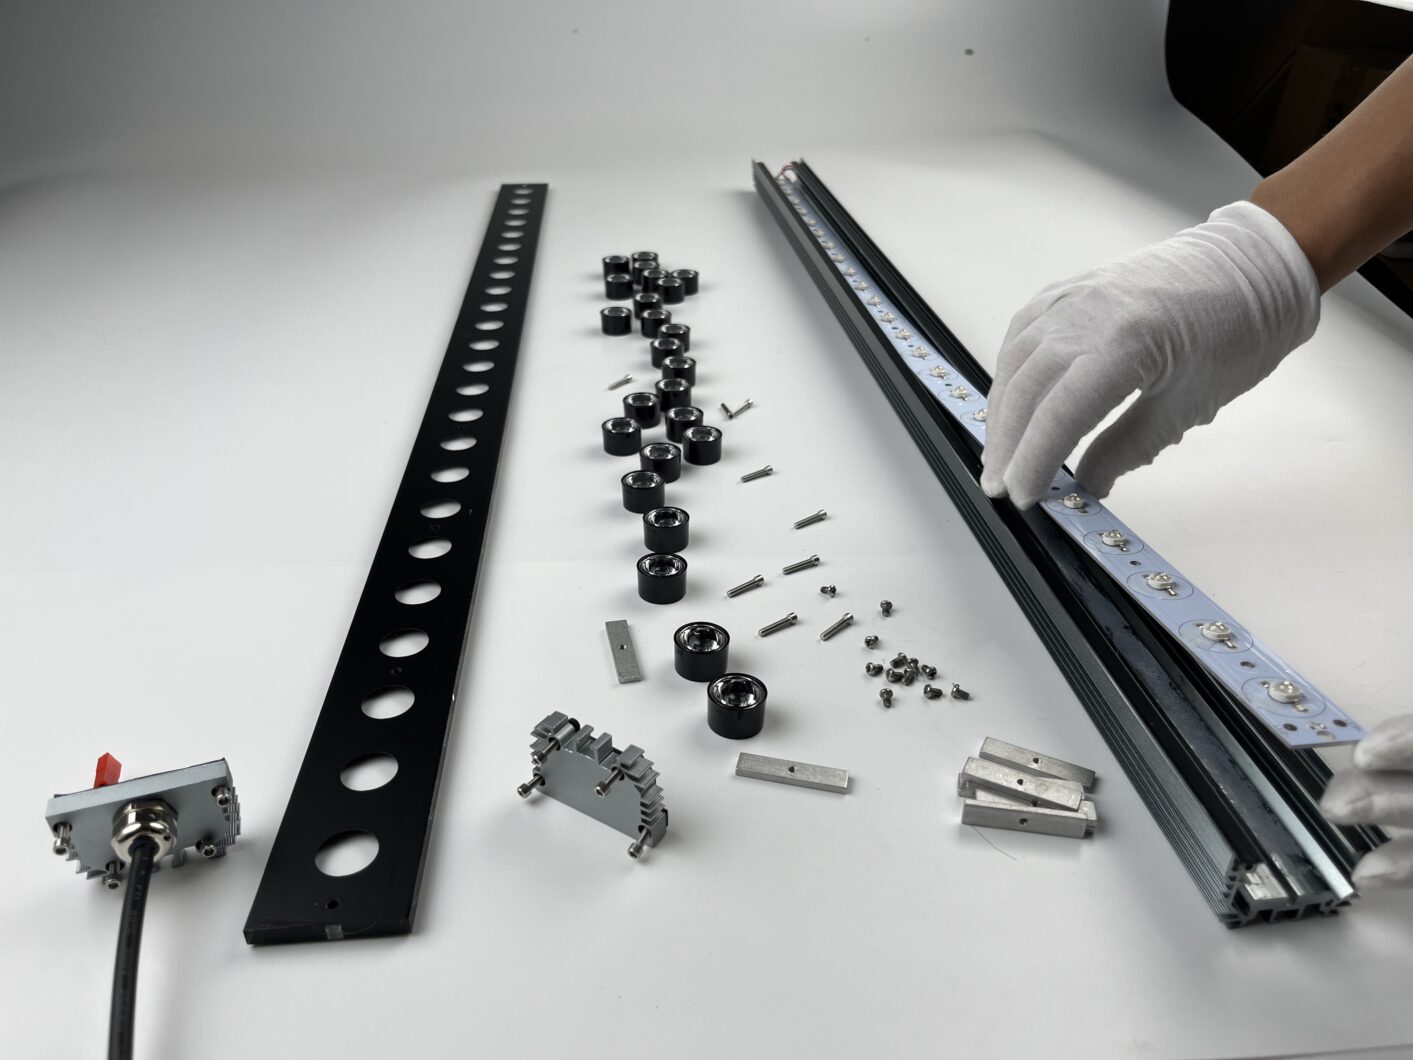
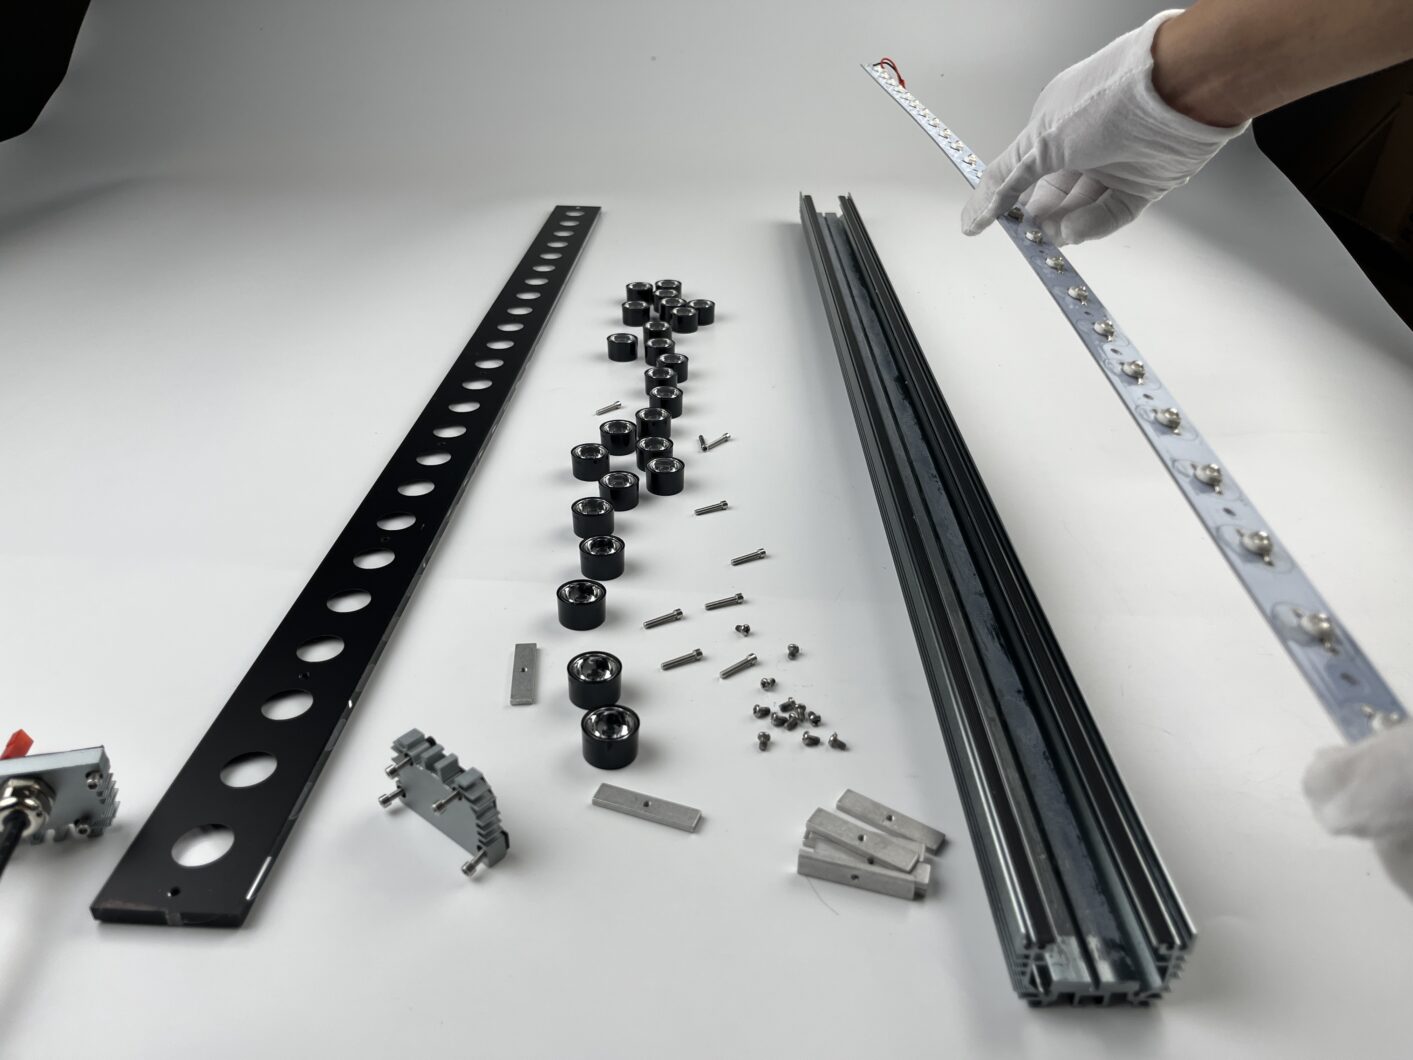
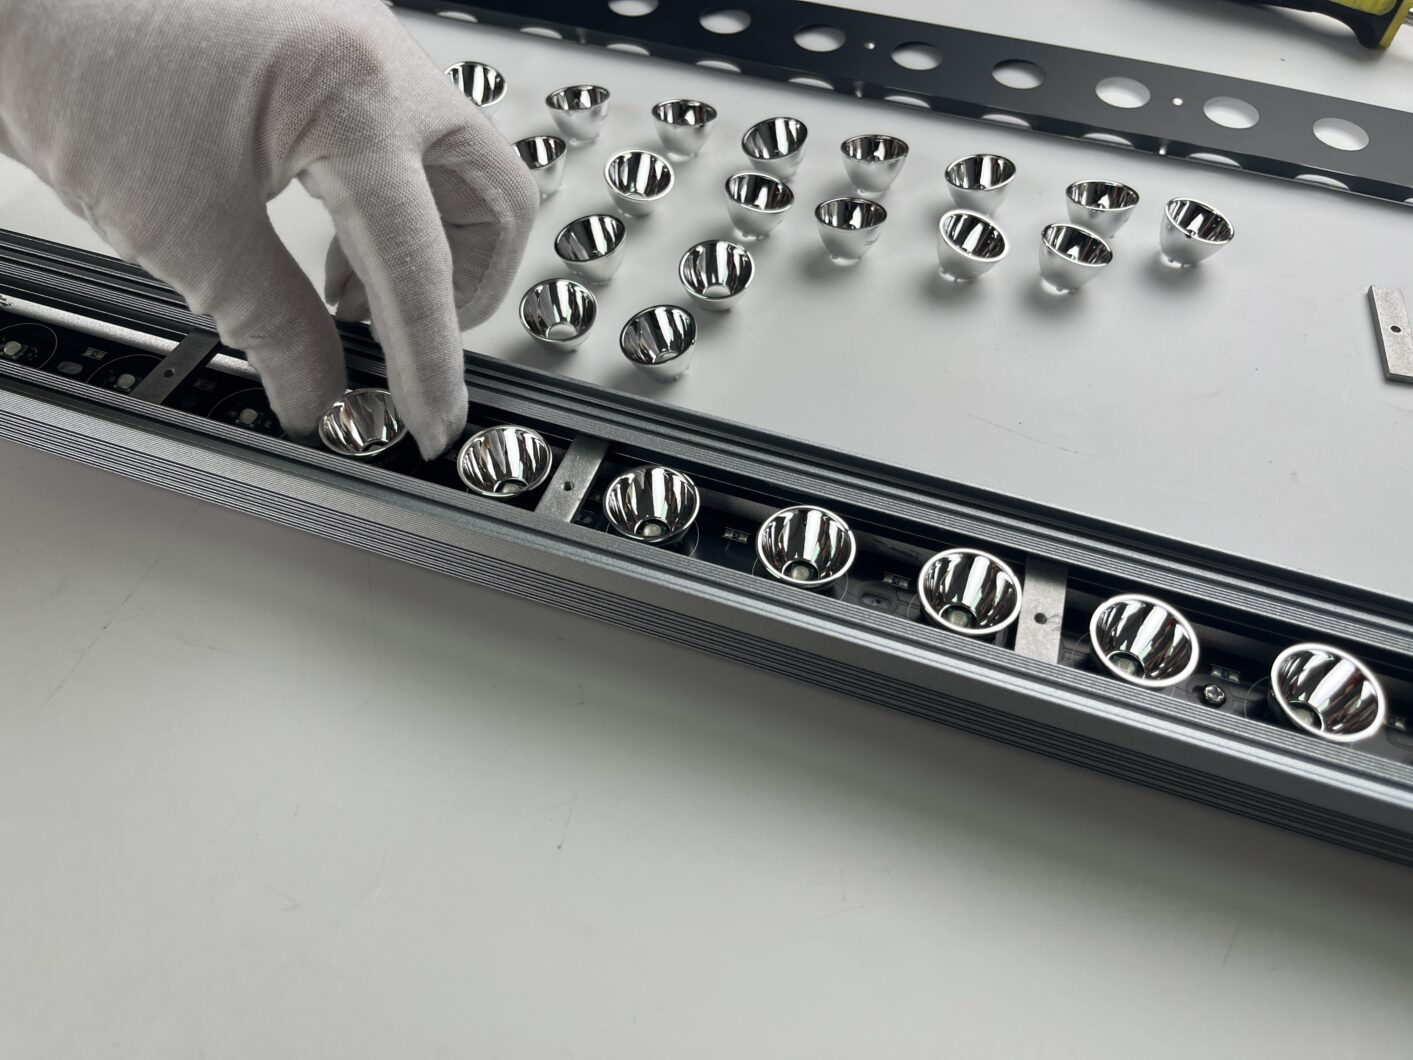
Remove Aluminum Pieces & Lenses: Take out the aluminum pieces (one for every three LEDs). Remove the LED lenses (Photo 10).
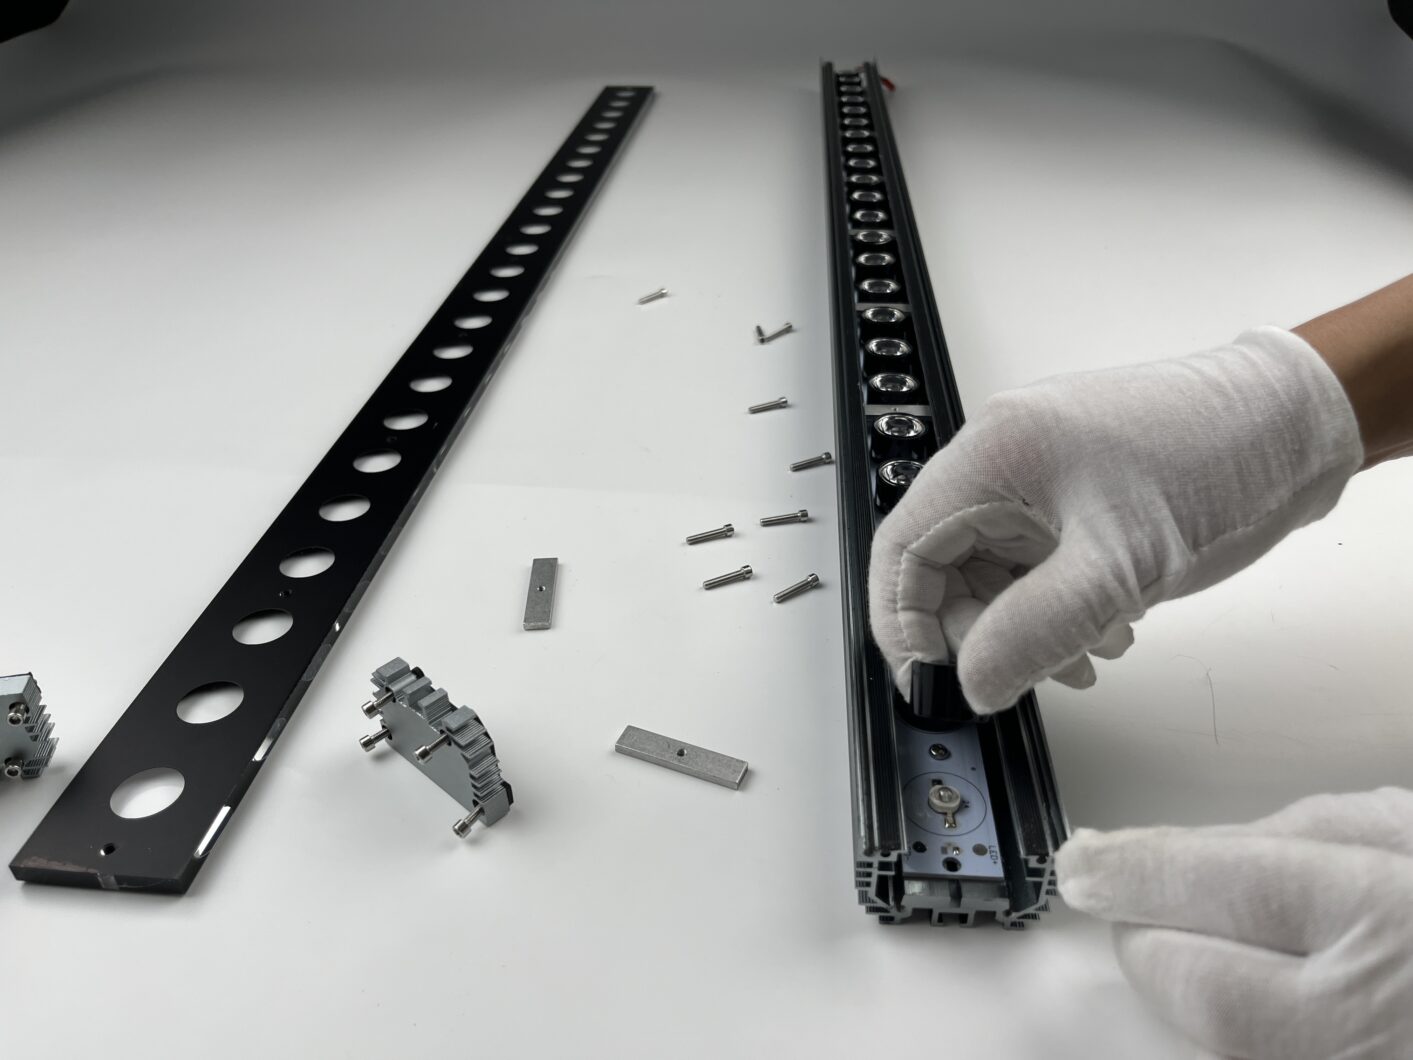
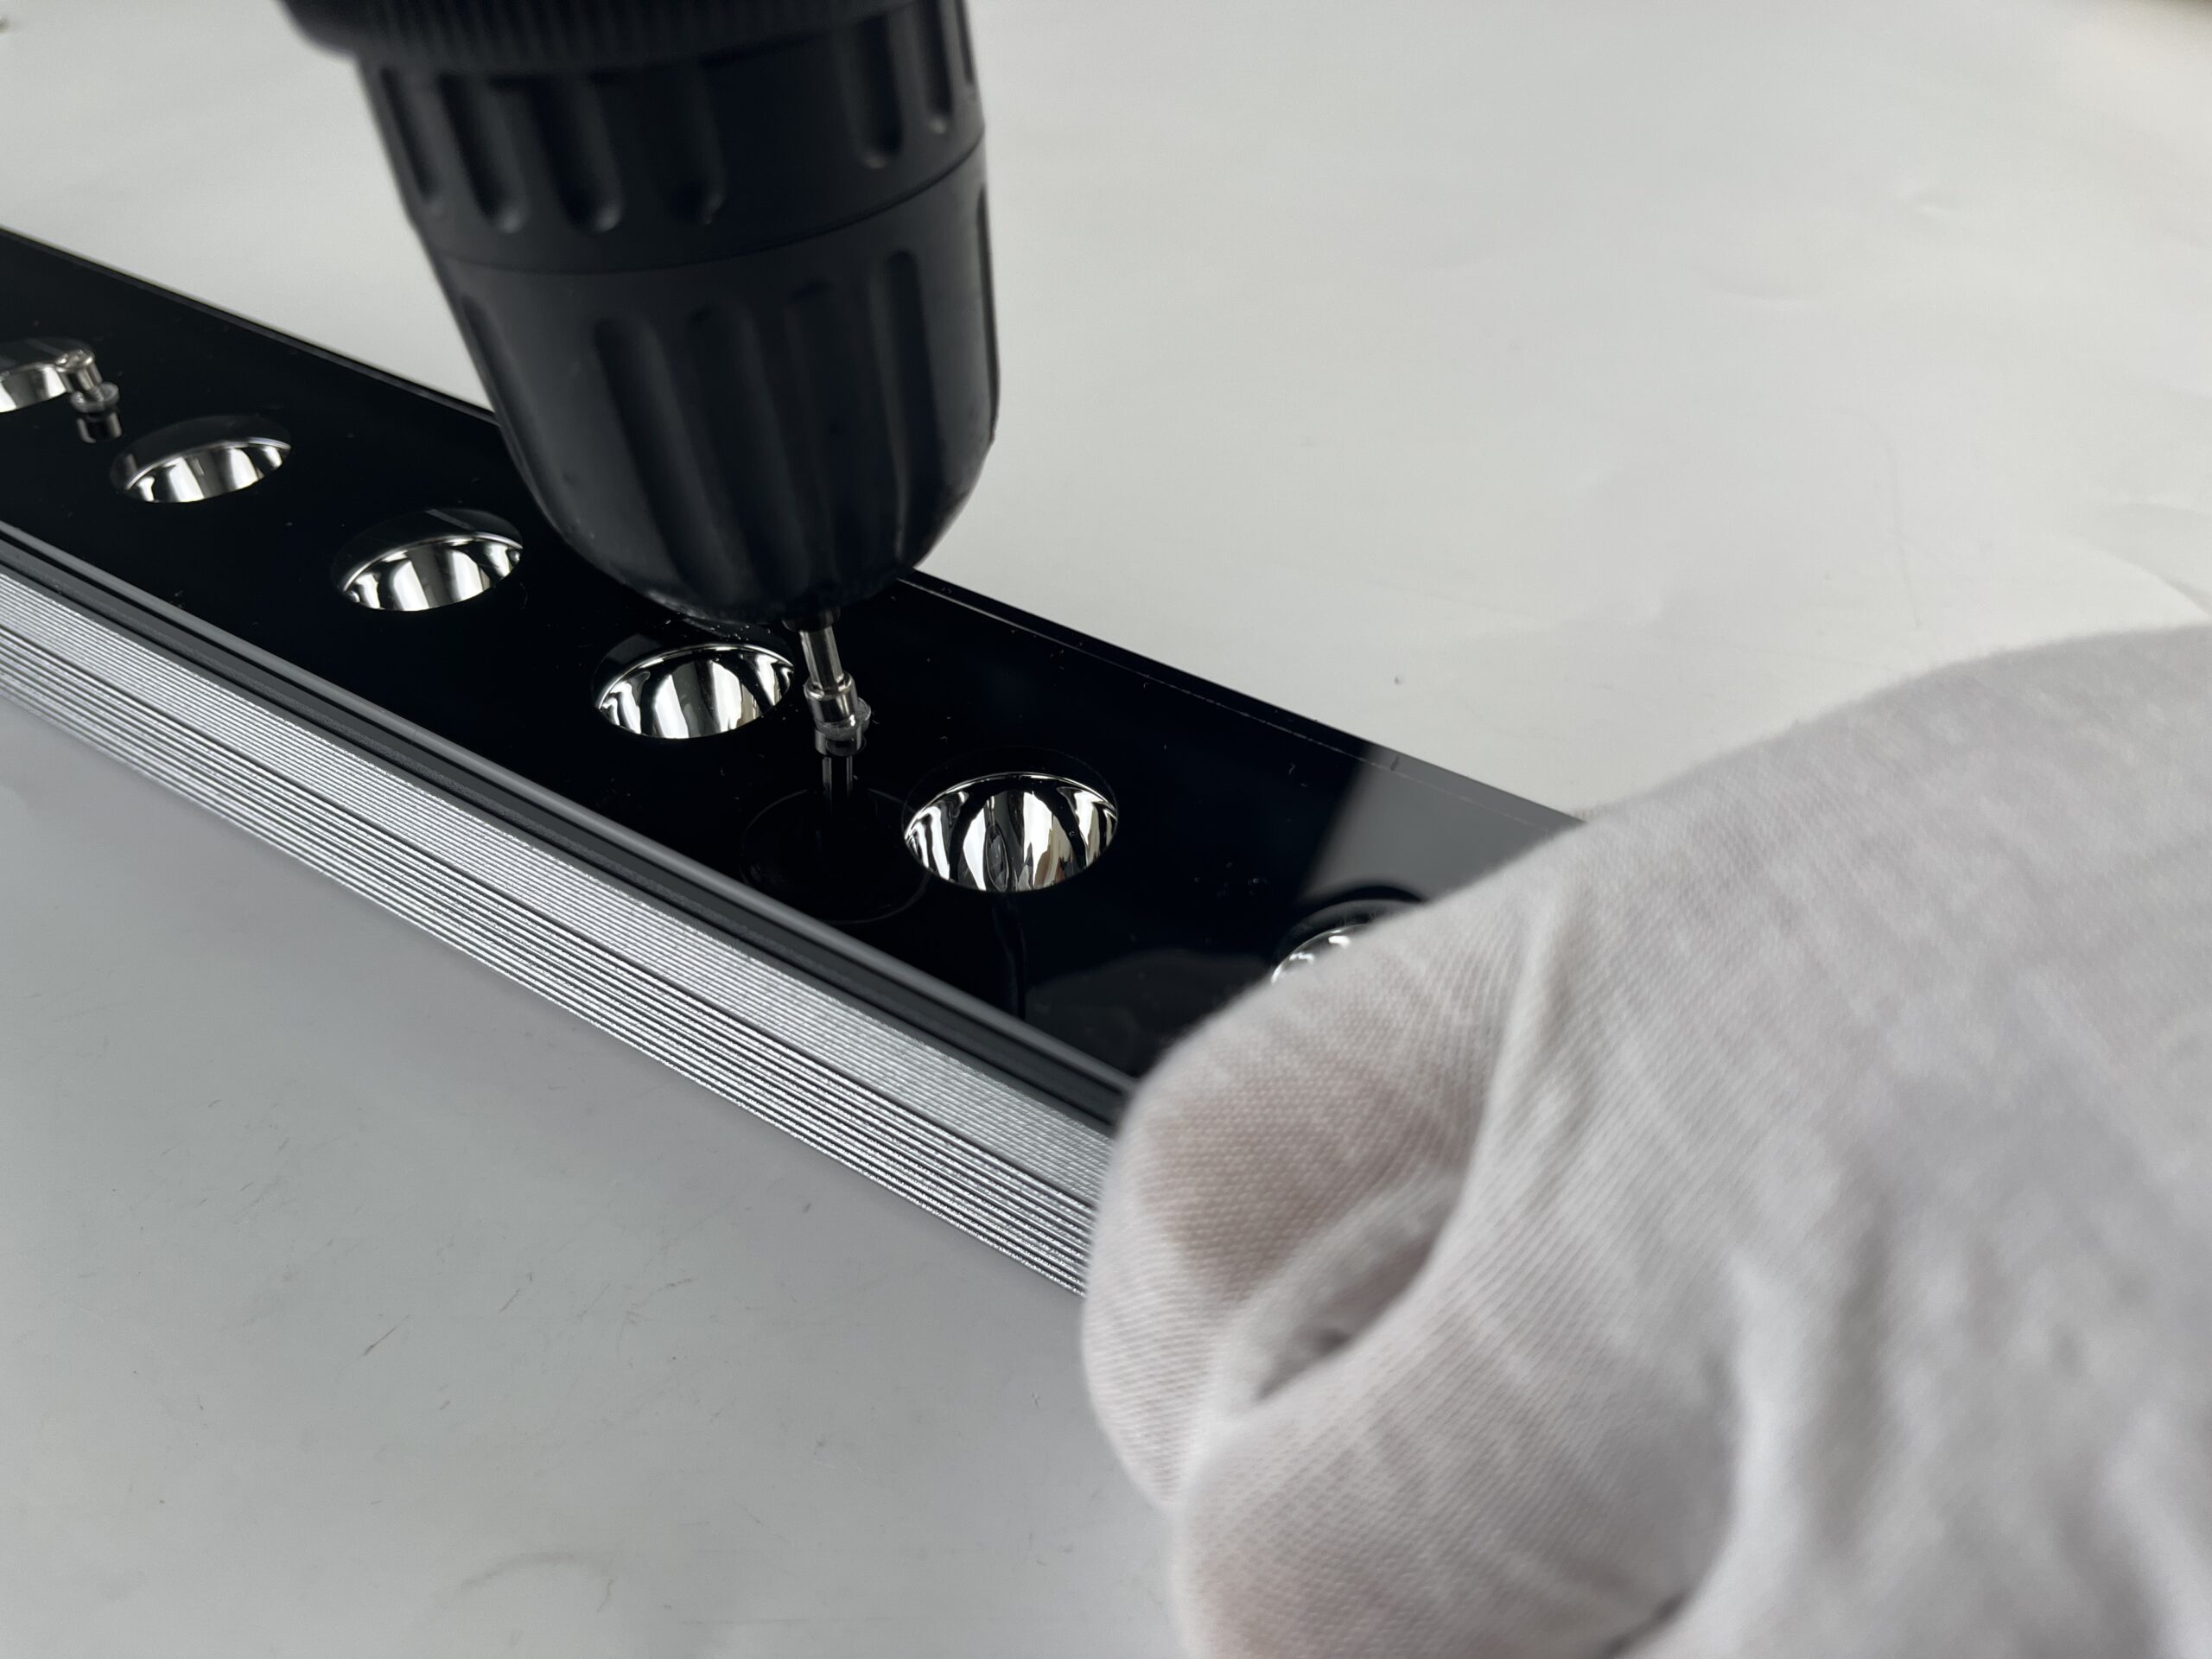
Remove the OR3 LED PCB: Unscrew all screws securing the OR3 LED PCB. Remove the PCB (Photos 11 & 12).
After removing all parts and components we suggest you group again all similar components and place them in an organized way to make the reassembly process easier for you and also to avoid loosing pieces.
STEP 2: OR4 LED PCB Installation & Reassembly of the Unit
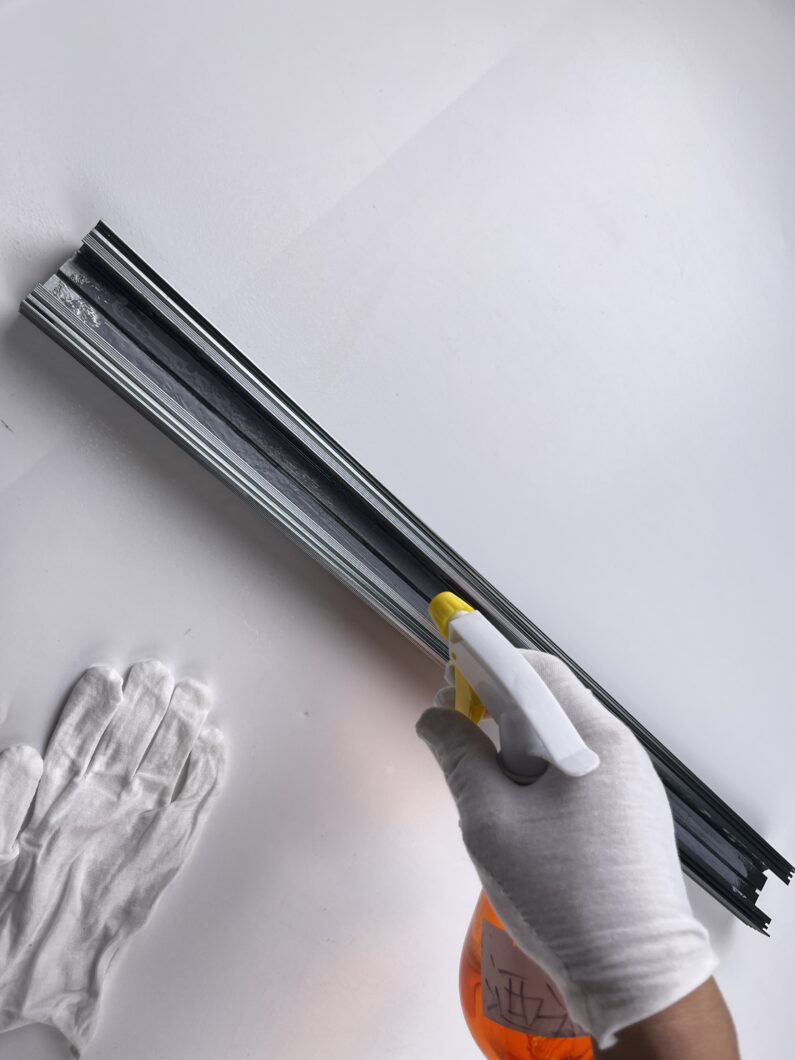
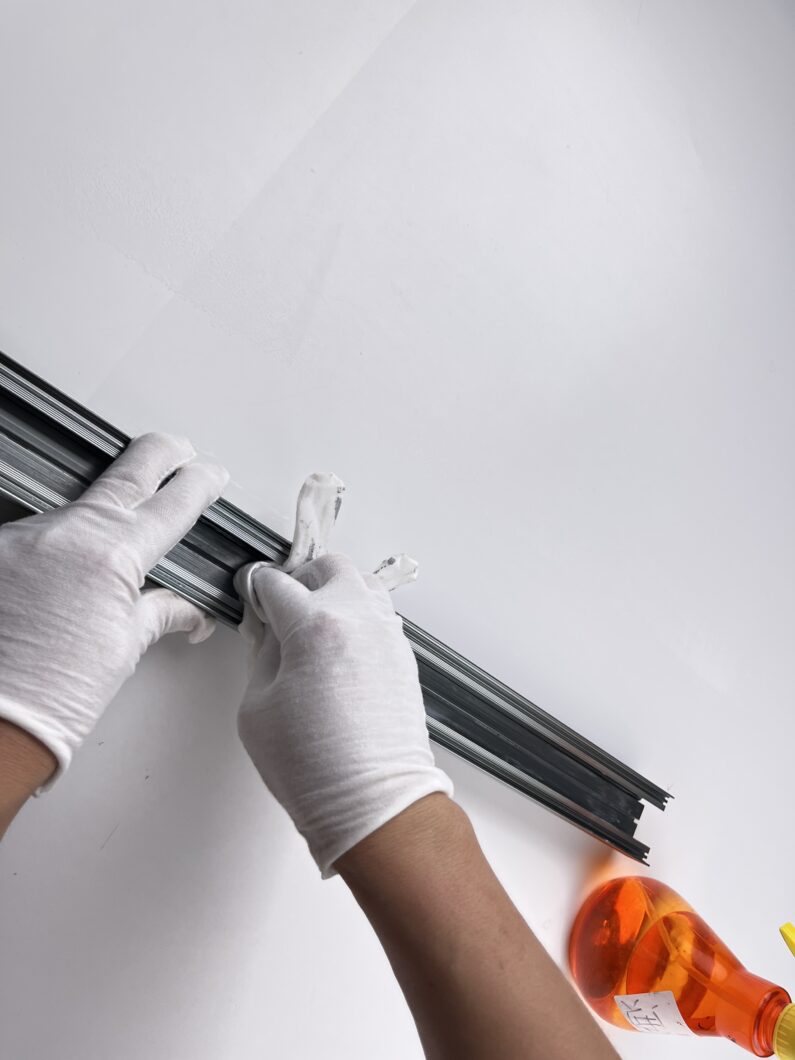
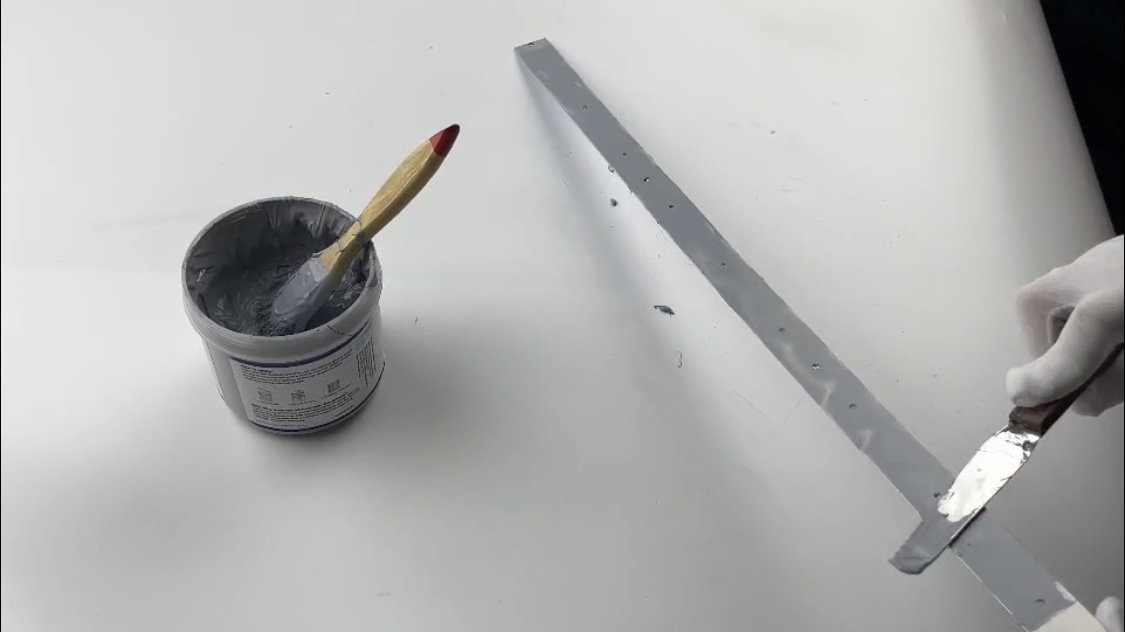
Prepare the Heatsink before placing the parts for reassembly: Clean the surface of the heatsink with 99% isopropyl alcohol or a dedicated thermal paste cleaner to remove any old residual thermal paste as seen in photos 13 & 14. Ensure the surface is completely dry.
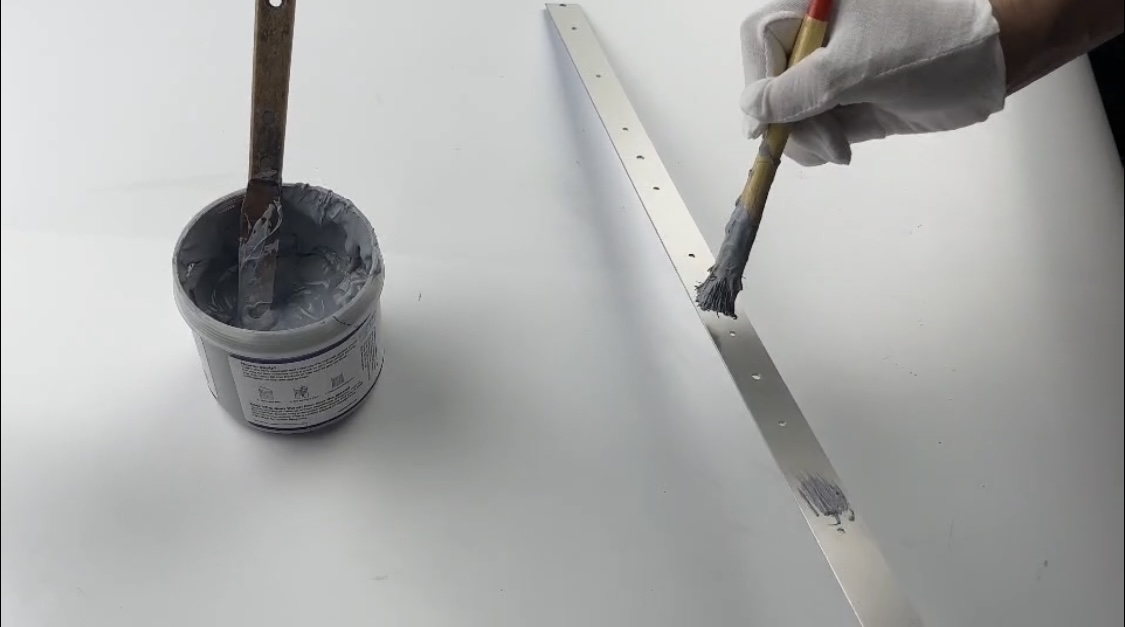
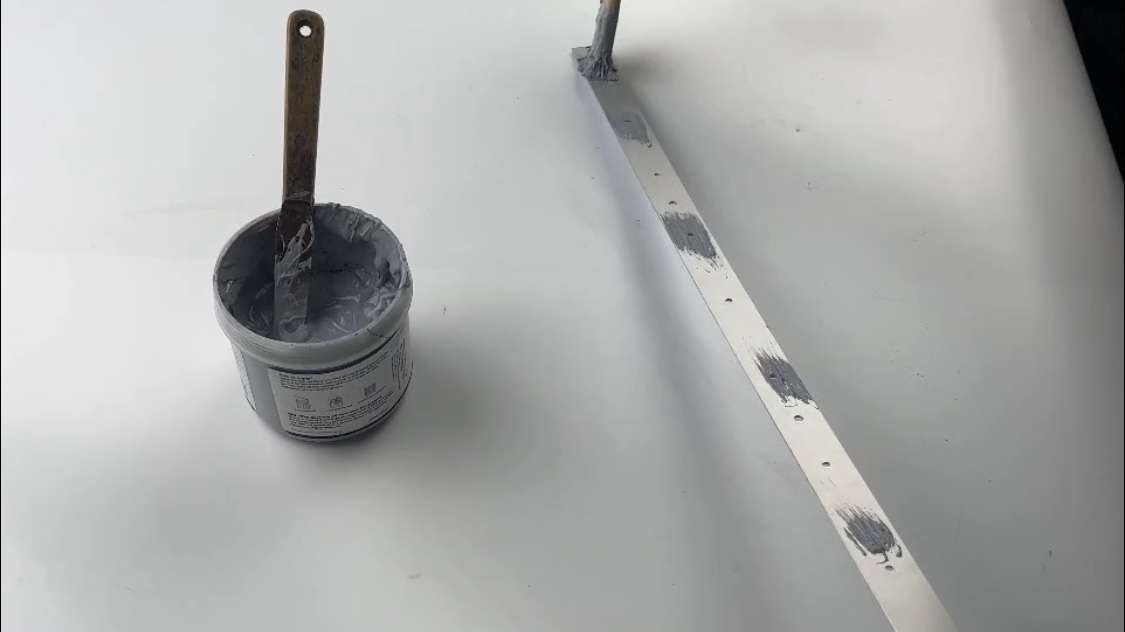
Apply Thermal Paste & Install OR4 LED PCB: Apply a thin, even layer of new thermal paste to the back of the OR4 LED PCB. Place the new PCB onto the heatsink (Photos 15, 16 & 17).
Obs.1: As mentioned before, Orphek doesn’t supply thermal paste or cleaning products, nor can we advice on specific brands. We recommend purchasing a high-quality thermal paste to ensure your equipment stays protected.
Obs.2: For optimal heat transfer, apply a thin, even layer of thermal paste. Using too much may reduce its effectiveness, so a little goes a long way!
Gently place the new PCB onto the heatsink of your OR LED Bar as shown in the photo 18 & 19
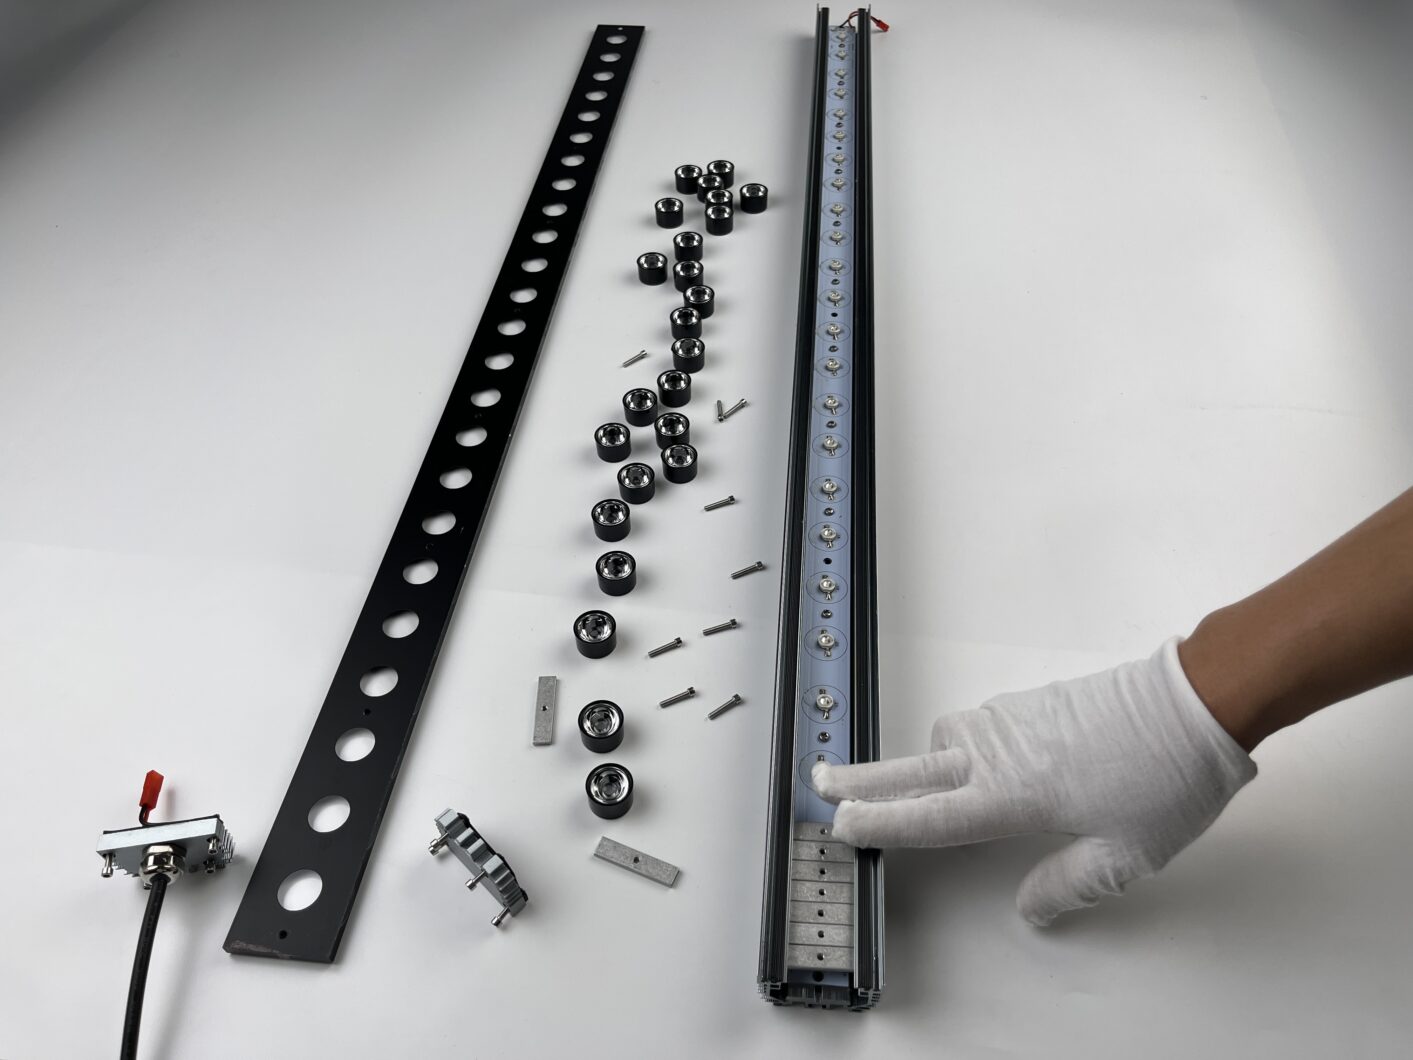
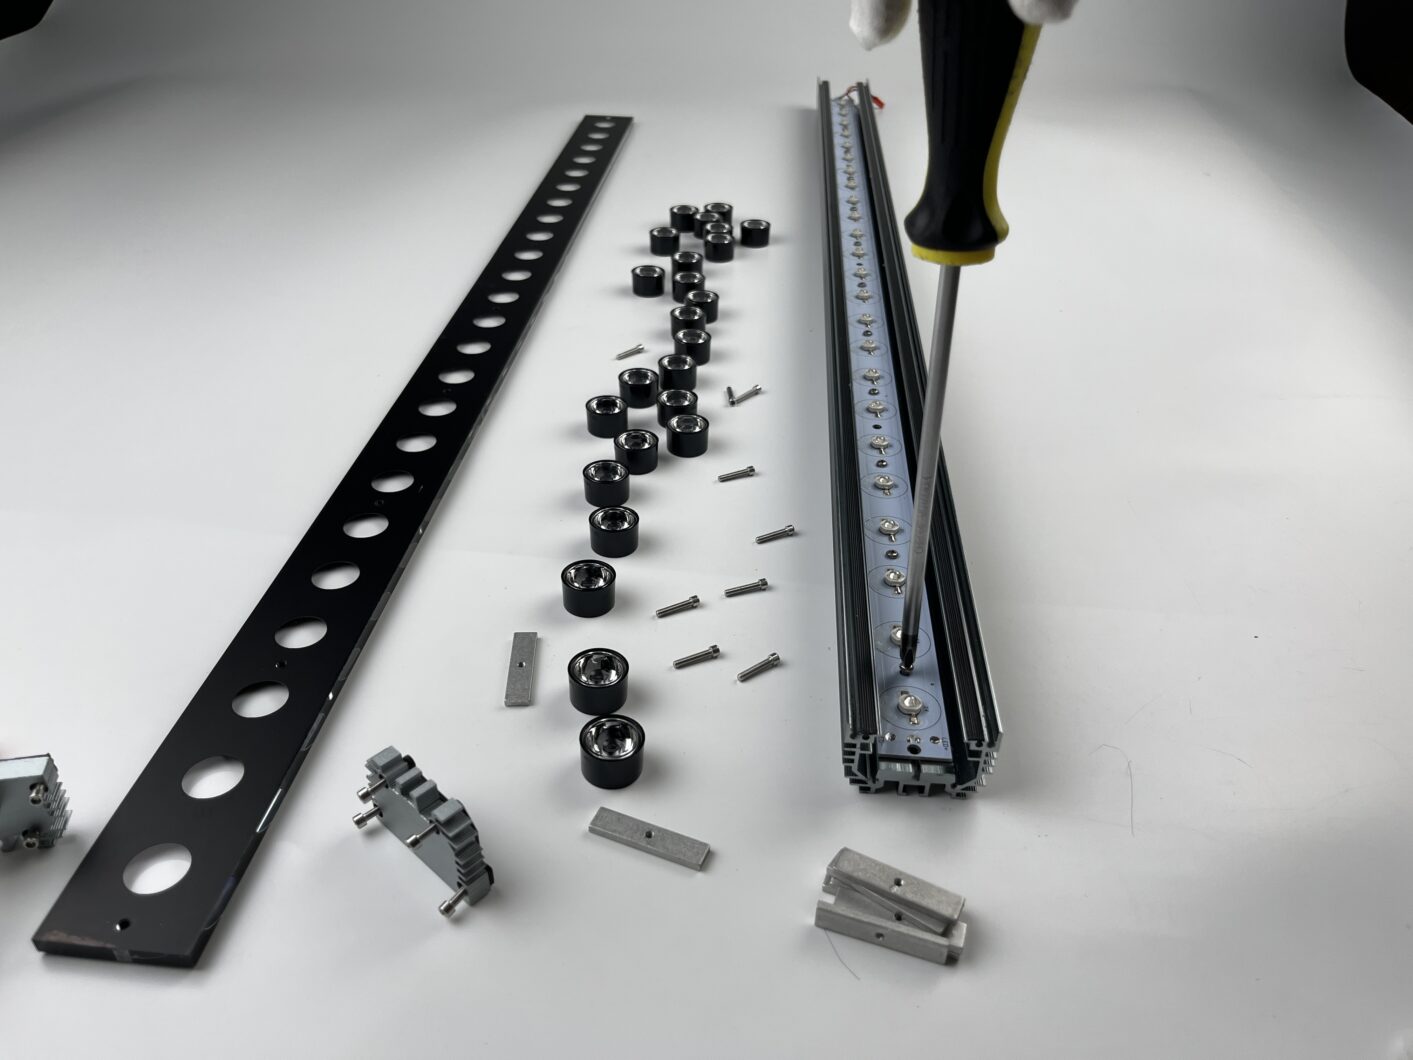
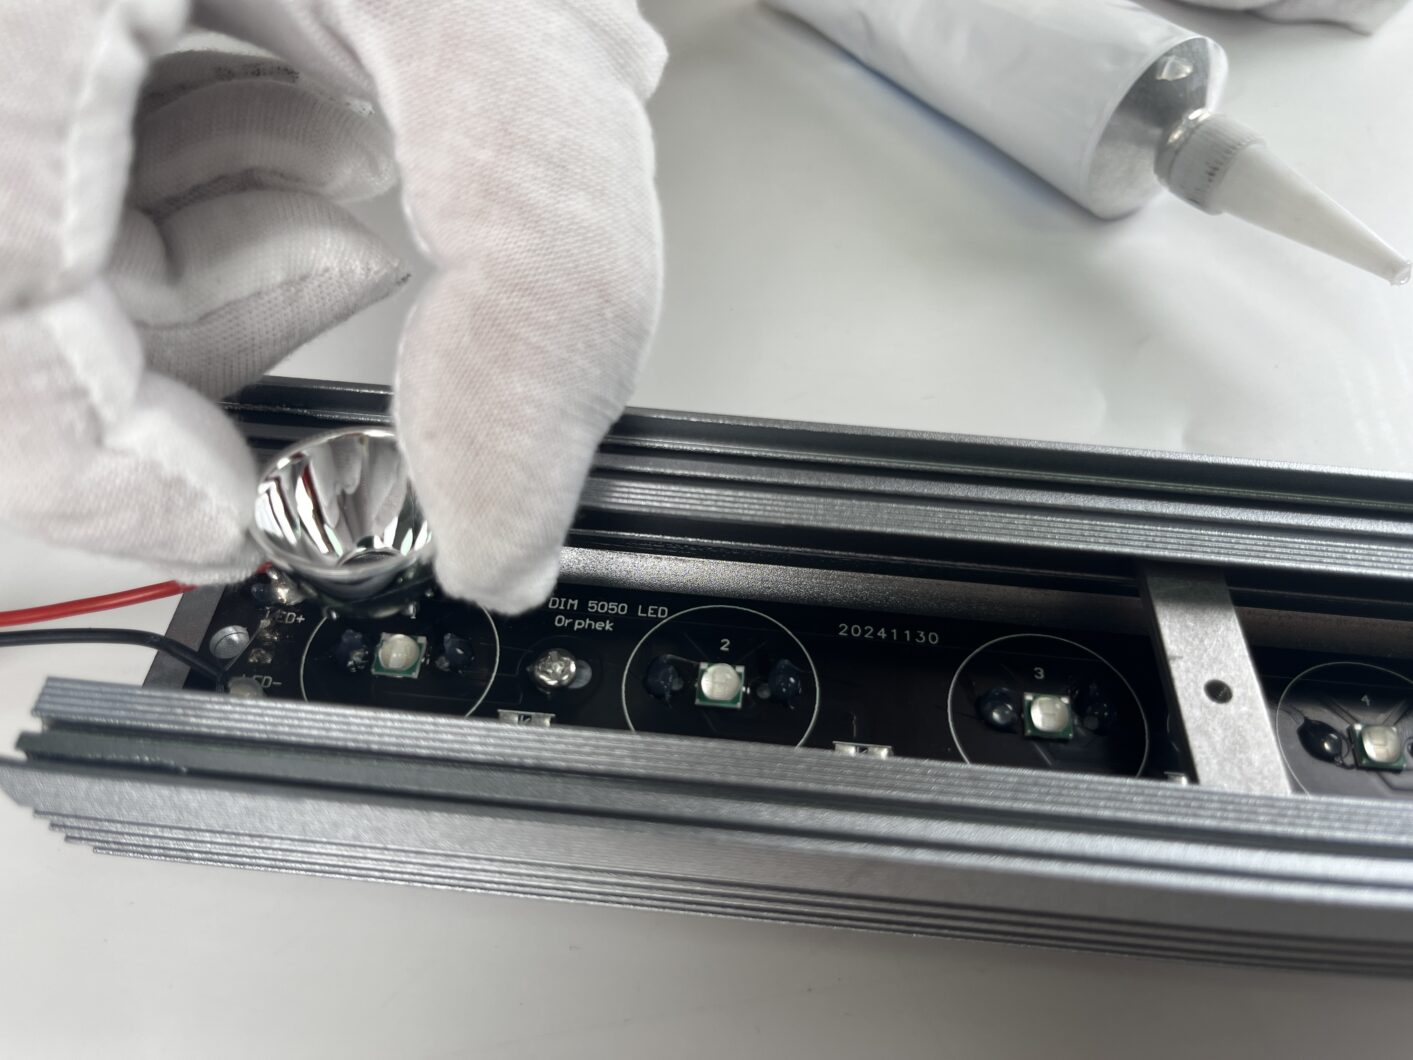
Install Aluminum Pieces & Reflectors: 2 steps.
Place the aluminum pieces back (one piece for every three LEDs) in their original positions. Remember to replace and tighten all screws.
- Place the new OR4 LED reflectors back in the original positions, one by one as shown in the next photos below. (Photos 20 & 21)
After completing to place all aluminum pieces and all reflectors to their original place you are ready to go to the final step.
STEP 3: OR4 LED PCB Completing Reassembly & Closing the Unit
Clean & Replace Top Acrylic: Clean both sides of the top acrylic with a wet cloth, then dry it thoroughly with another clean, dry cloth. Place the acrylic sheet back onto the OR3 LED Bar. (Photos 22 & 23)

Reattach Side Cap: Place the aluminum side cap back in its original position. Secure it with the screws. Tighten the screws until snug, but avoid over-tightening to prevent damage to the acrylic (Photo 24).
Reconnect & Close: Reconnect the red connector. Carefully tuck all wires inside the unit, ensuring they are not pinched or stressed, and close the remaining side. (Photos 25, 26 & 27)
Attach Final Side Cap: Close the aluminum side caps on both sides by placing them and screwing back all remaining screws as shown. (Photos 28 & 29)
Final Checks & Considerations
Tooling: Orphek does not provide the necessary tools for disassembly and reassembly.
Thermal Paste: Orphek does not provide thermal paste or cleaning solutions.
Reassembly: Double-check that all parts are placed in their original positions. Refer to the photos you took during disassembly if needed.
Congratulations! You have successfully upgraded your Orphek OR3 LED Bar with the OR4 LED PCB, featuring Orphek’s 6-watt Dual-Chip Power LEDs and new proprietary 70° reflectors.
We hope you enjoy the enhanced performance!
Go to Orphek shop on line if you are also interested in Upgrading to OR4 iCon Operating System with our Orphek iCom Dim Driver:
About/ Purchase Orphek iCom Dim Driver – Go to Orphek Online Shop